User Manual of ANSEC
Register
Here we had given process that how to get NOC from AAI and which document will require getting NOC certificate.

- 1. User will enter Full name, Email id and their Mobile number and click on SUBMIT button.
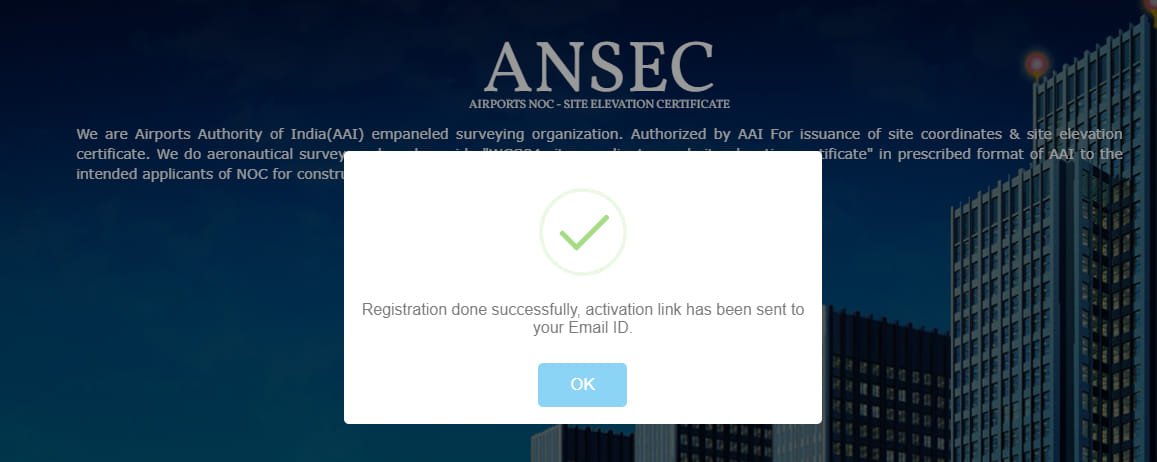
- 2. After click on SUBMIT button, user will get ‘Activation mail’ on respective email id and when user click on activation link then their account will be activated.
- 3. On successful activation, user needs to login to application using mail id or mobile number.
Login
This is Login page on which user can login with registered Email or Mobile No.

- 1. User will enter registered email id or Contact number.
- 2. User has to click on ‘Get OTP’ and user will get OTP on registered email and mobile number.
- 3. When user enter OTP and click LOGIN button, then login will successfully done.


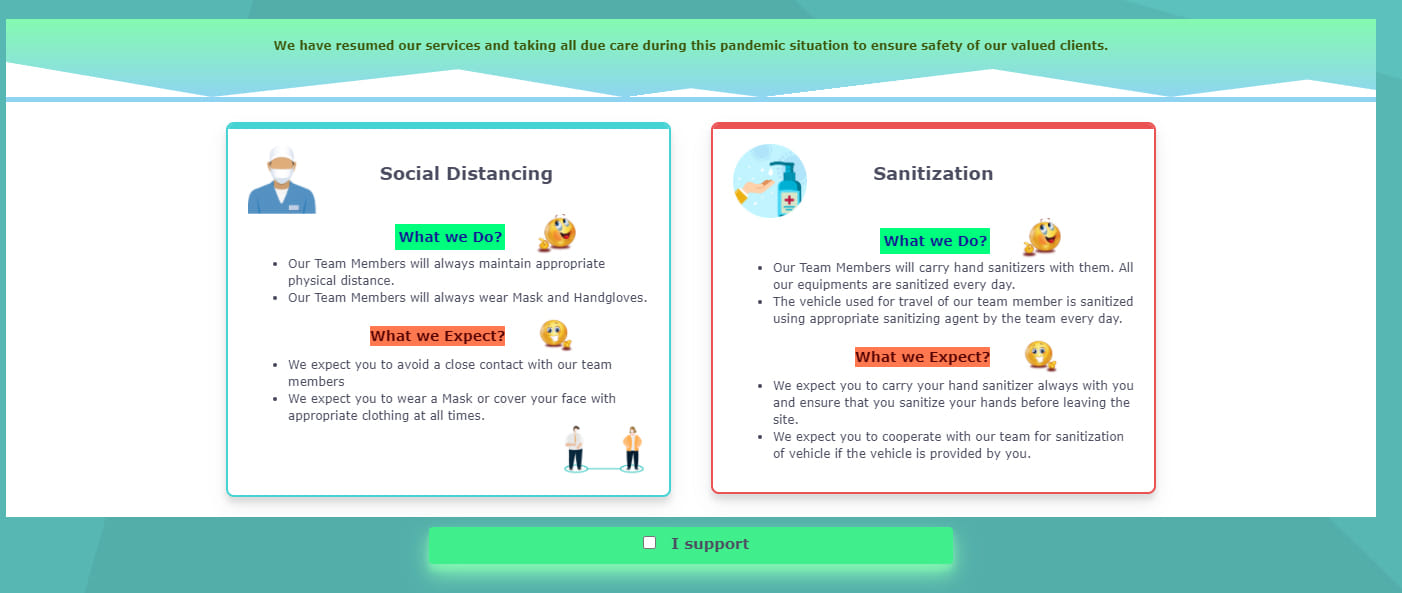
After the successfully login user navigate to Advisory page, then click on the check box user navigate to home page.
Dashboard
On successful validation, then user navigates Home Page.
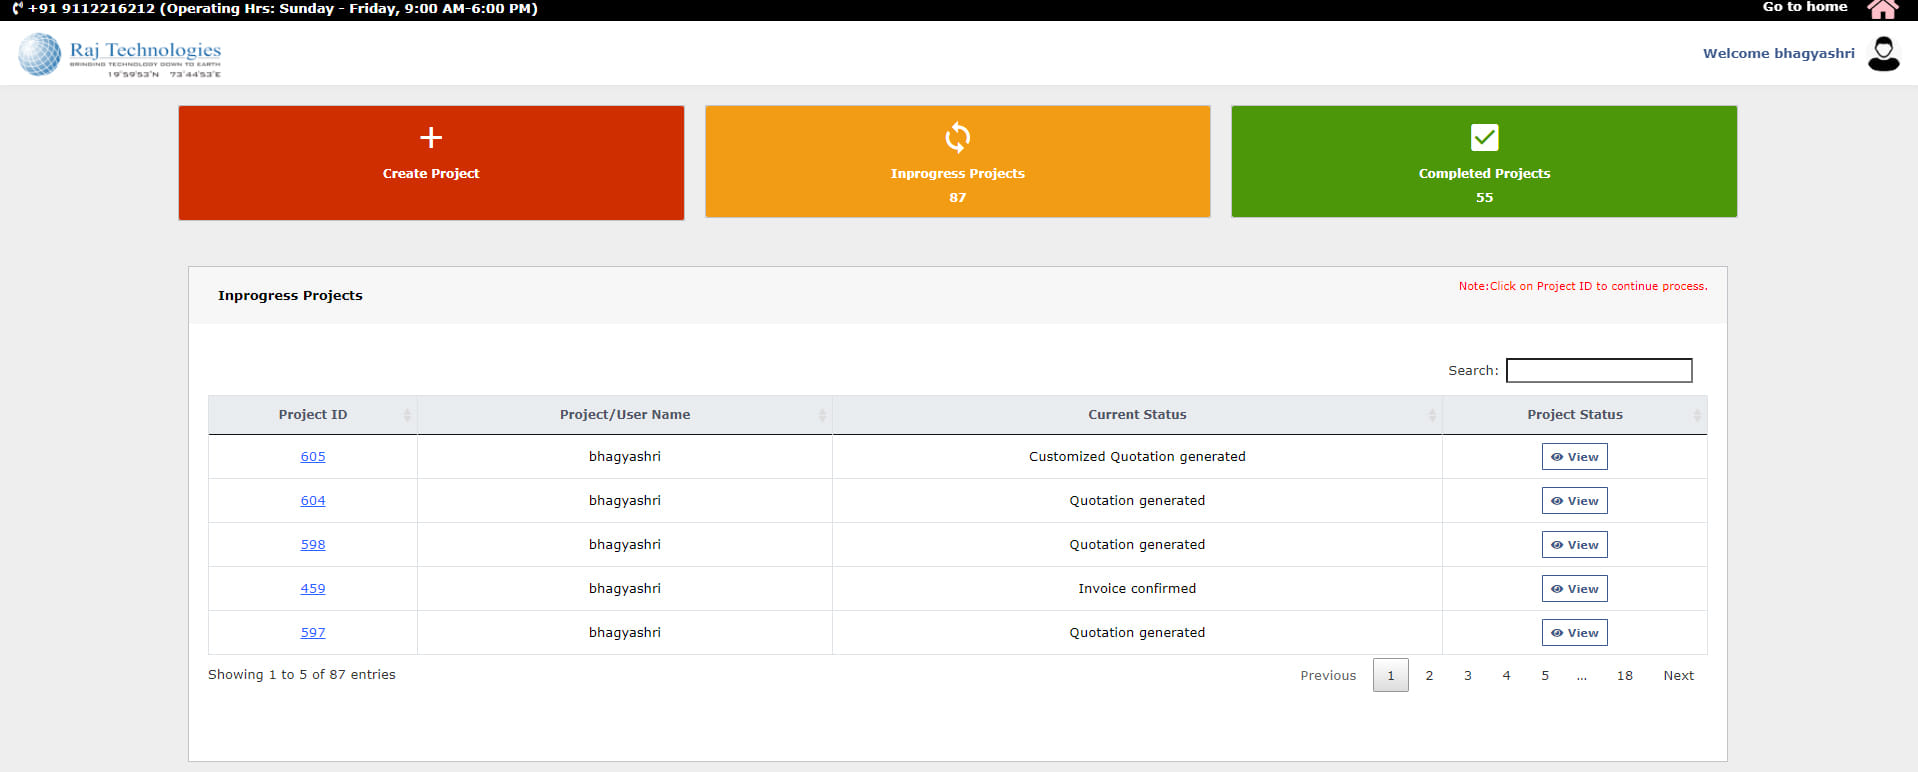
This is the user’s home page which contains on the header the mobile no. for contact and Go to home button and just below of that user views the company logo to left side corner and profile name, logout option at right side corner. It also contains the three boxes as follows:
- Create project: User creates the new project.
- In progress project: It contains the list of in progress project with count.
- Completed project: It contain the list of completed project with count.
Create Project
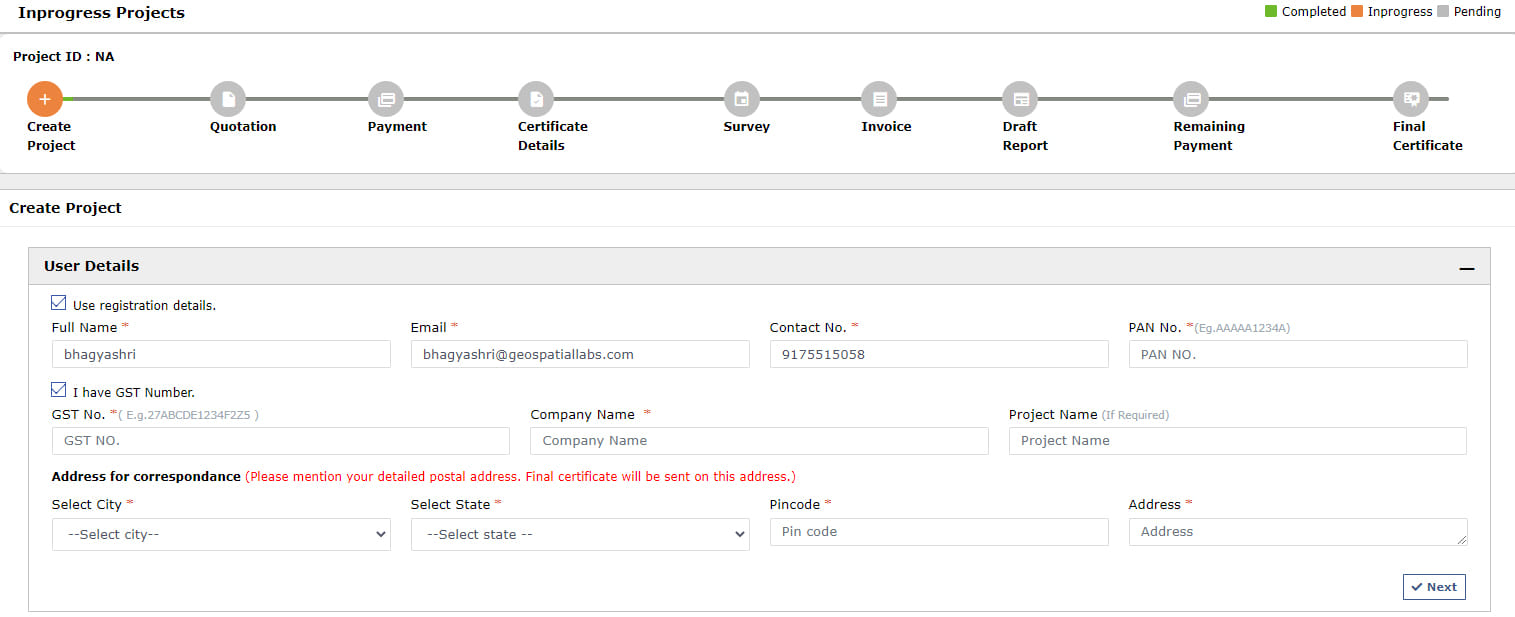
1. User views the project status bar. On the status bar completed state view in green color, progress state view in orange color and the pending state view in gray color. If user clicks on Use registration detailscheckbox that time Full name, Email, Contact No. information will be fill by automatically.
- In this step user need to add user details of
- Full Name,
- Email,
- Contact No,
- PAN No
In this step user click on check box of I have GST Number that time automatically opens the field of GST No, Company Name, Project Name (If required) .
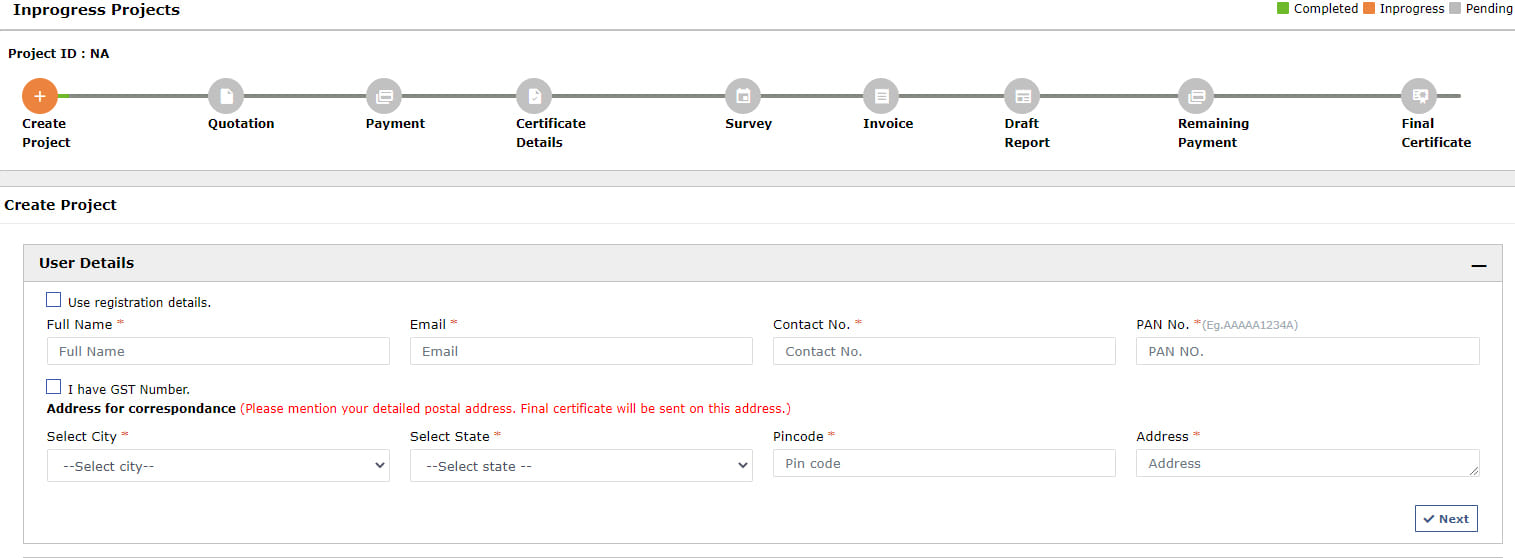
After that user has to fill correspondence address in which when user Select City that time state automatically update according to city and fill the Pin code of city and Address.
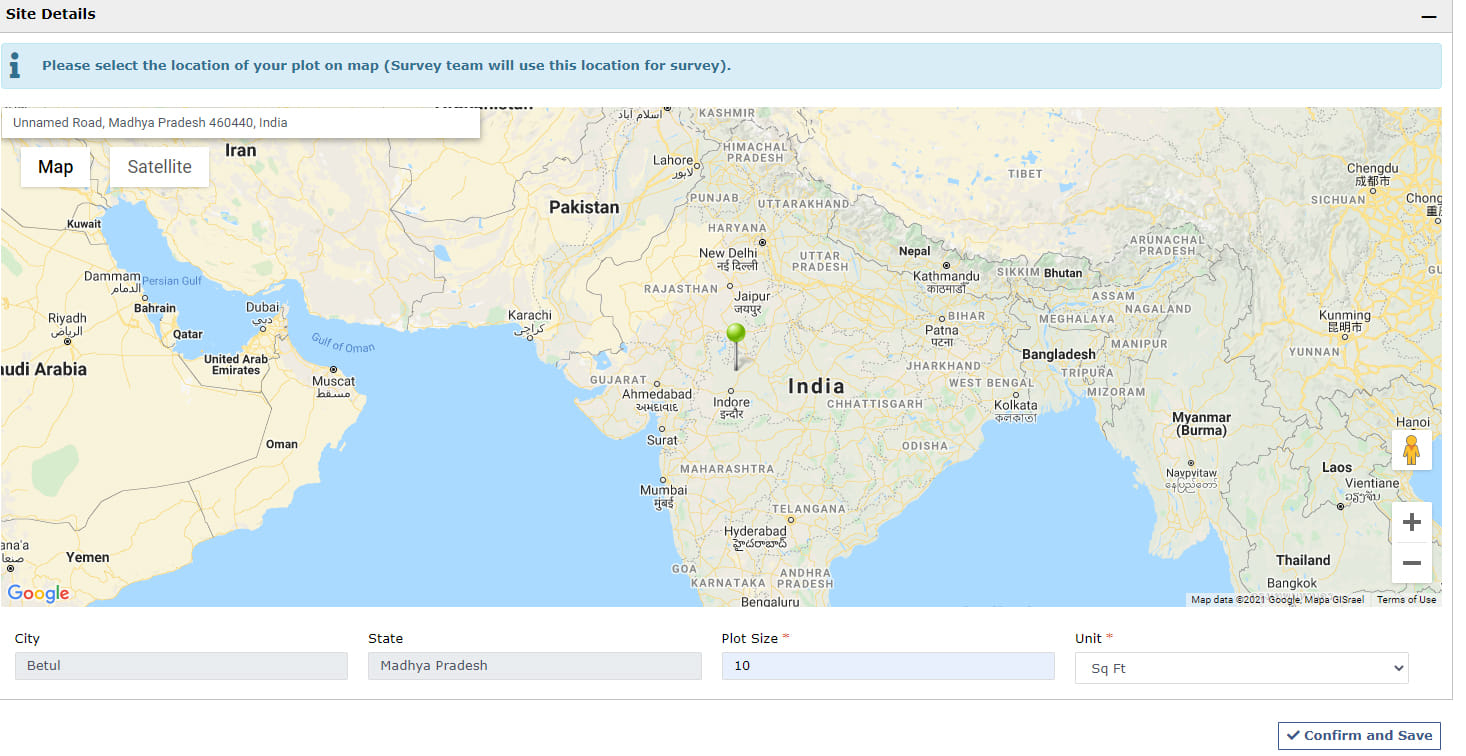
In order to User needs to select location of plot from Google map is mandatory then city and state automatically update according to that selected location ,
- In this step user need to add details of plot such as
- Size of plot
- Unit of Plot
- In this step user to need to add user details of Company name, Email, Contact person, GST no., PAN no.
In order to when user select city that time state automatically update according to city.
In this step user need to add details of plot such as size of plot and location of plot. In order to select location of plot, Google map is provided.
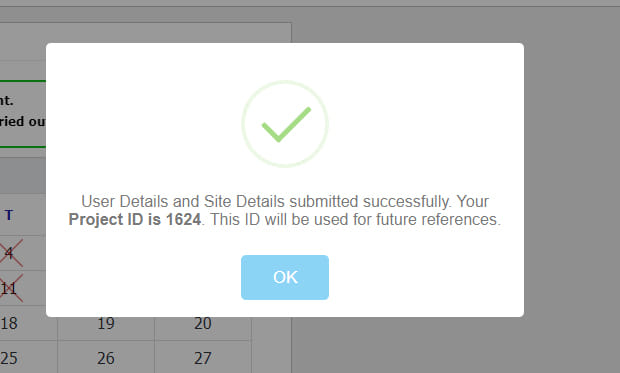
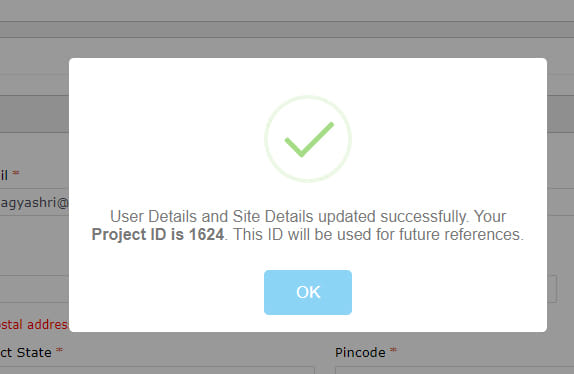
When user click on Confirm and Save button “ User details and site details submitted successfully” these message display in pop-up then navigate to Order confirmation page.
Order Confirmation
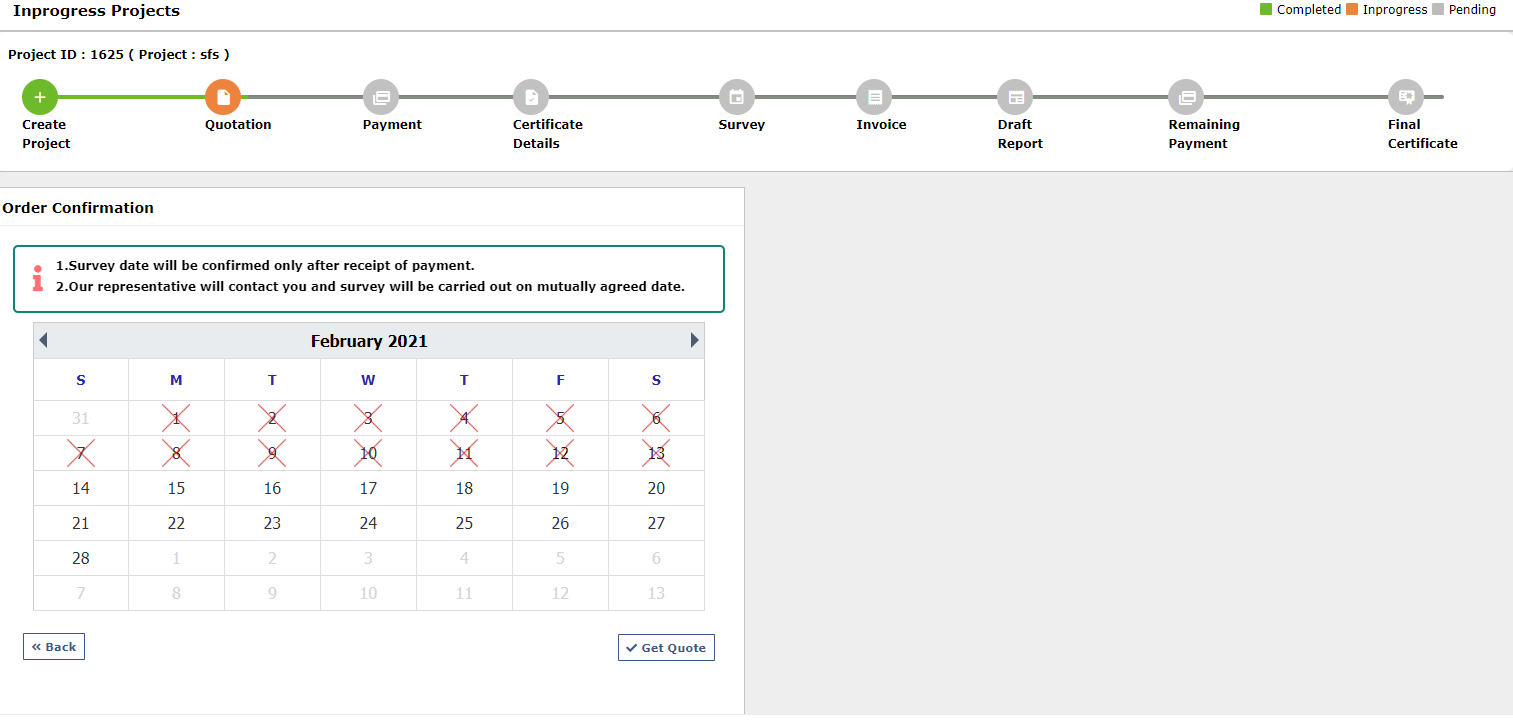
- User can view the status of state in orange color on project status bar.
- User can view unavailable date of survey.
- Also User has one more option to edit User and Site Details on Back button click.
- When user clicks on Get Quote button that time quotation is generated at right side of the page.
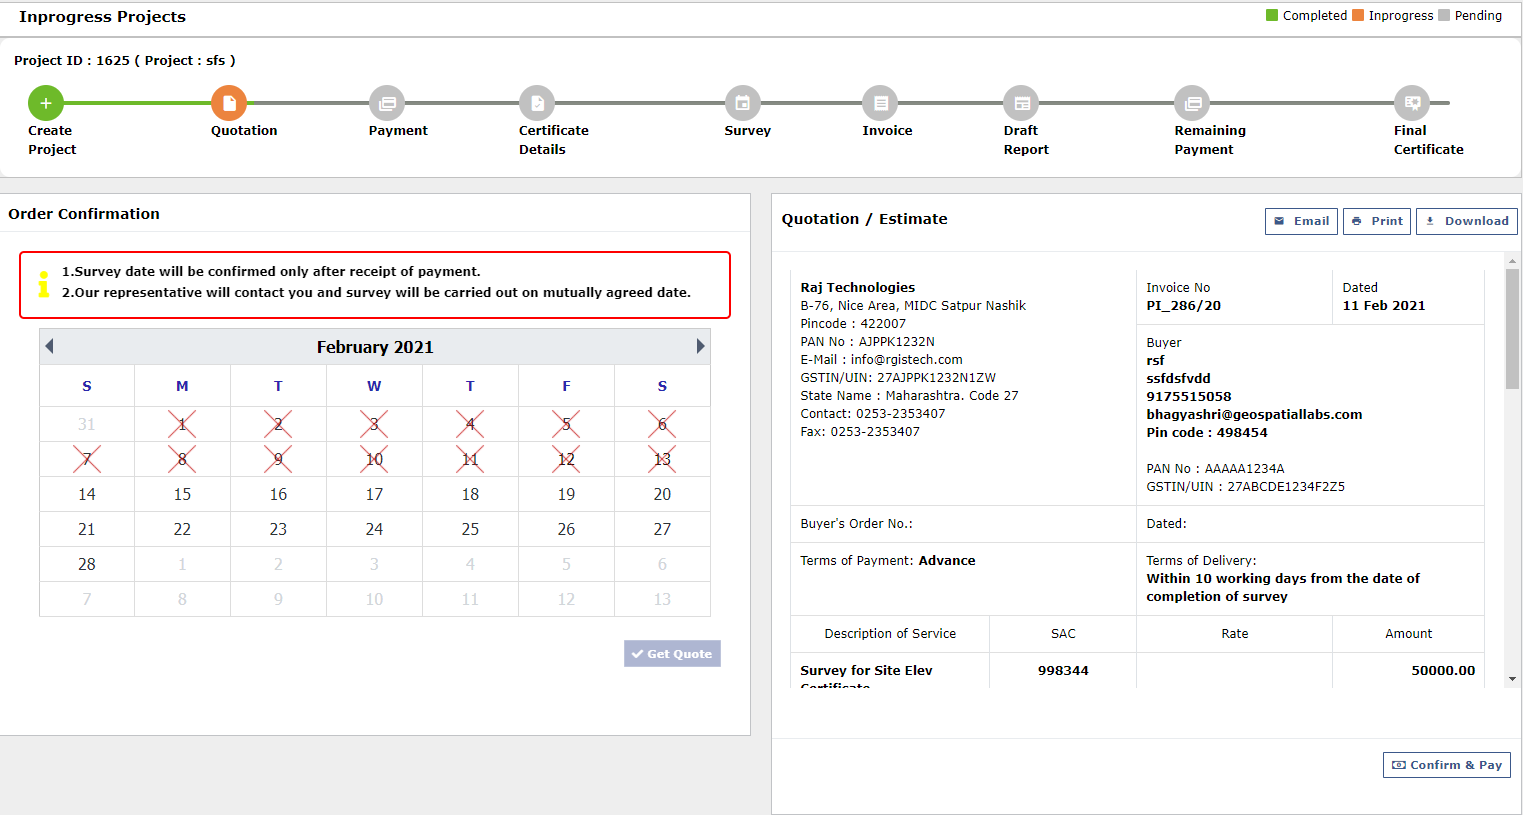
- User can view the Quotation. It has three options:
- 1. Email - User can send the Quotation by mail.
- 2. Print - User can print the Quotation.
- 3. Download - User can download the Quotation.
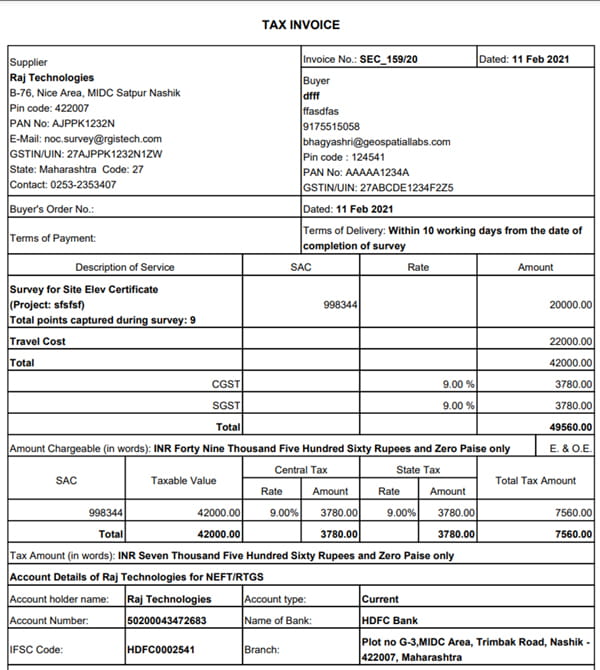
In the Quotation user can view the supplier details, user details, amount of survey, total captured survey point, account details of the organization.
If User wants to edit the user details and site details he/she needs to click on Create Project State of status bar and change user and site details.
When user click on Confirm and Save button “ User details and site details updated successfully” these message display in pop-up then navigate to Quotation page and on the quotation Regenerate button is appear.
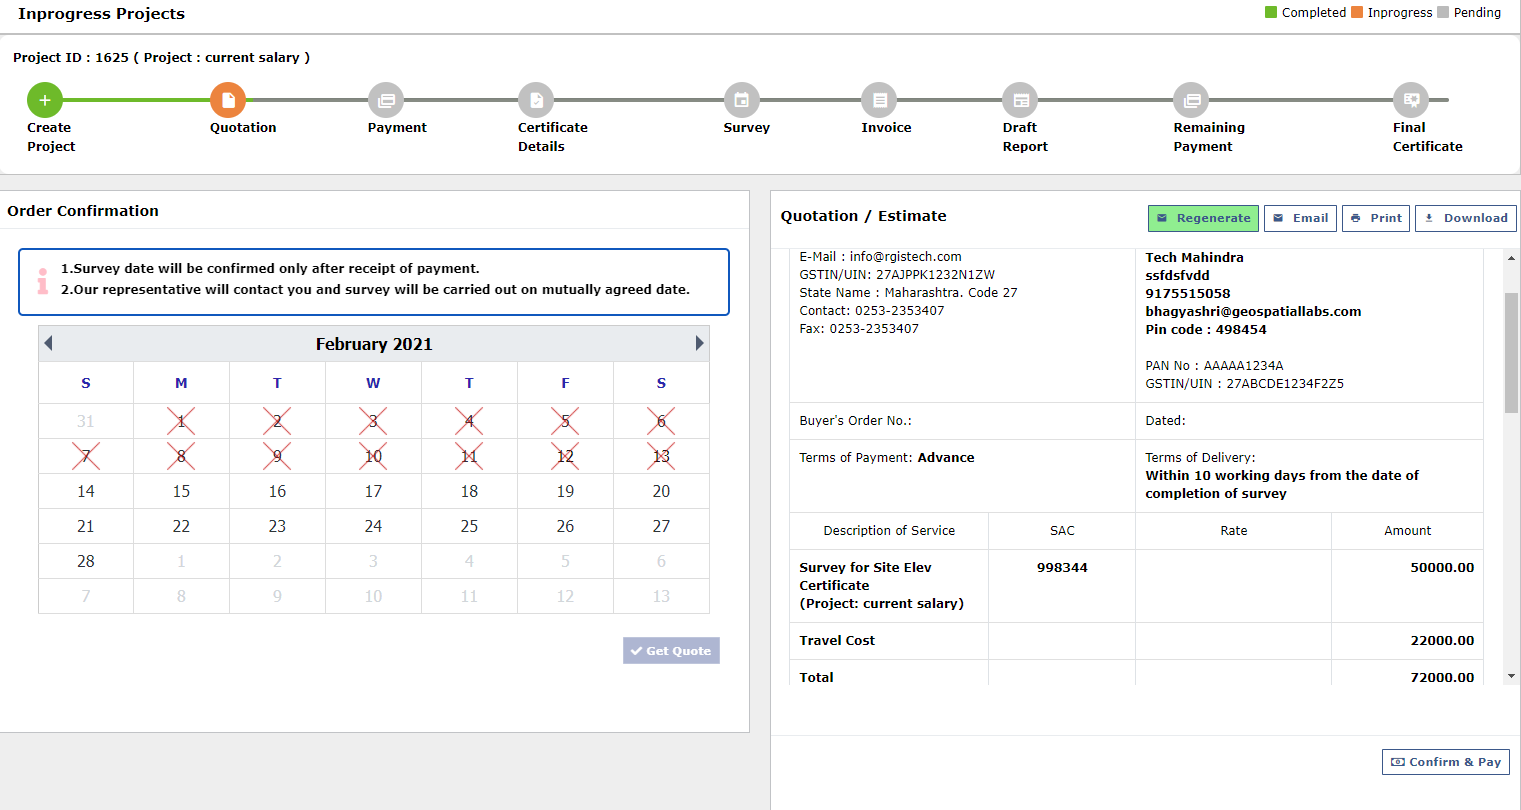
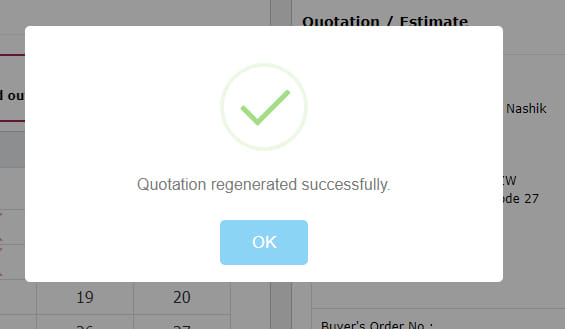
Users need to click on Regenerate button that time “quotation is regenerate successfully” message display in pop-up and regenerate the quotation.
Payment
When user click on the Confirm and Pay button which on Quotation is navigate to Advanced Payment
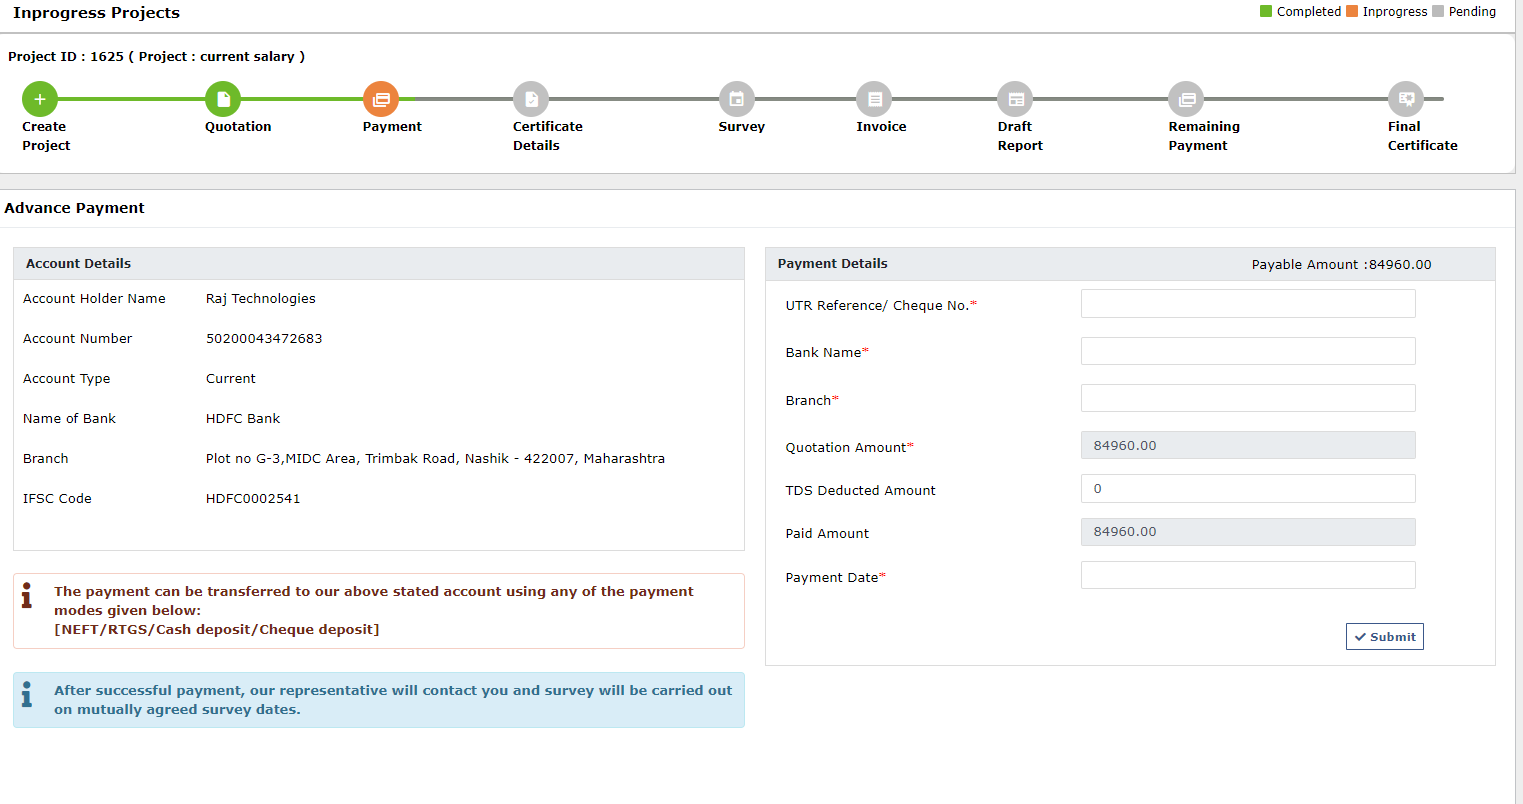
- On the project status bar the state of payment is view in orange color.
- At here User able to view the Organization account details like:
- holder name
- Account number
- Account type
- Name of Bank
- Branch
- IFSC Code
- Then User Filled Payment details like
- UTR Reference /Cheque No.
- Bank Name
- Branch
- Quotation Amount (default loaded).
- TDS Deducted Amount
- Paid Amount is (auto calculated based on TDS deduction).
- Payment Date
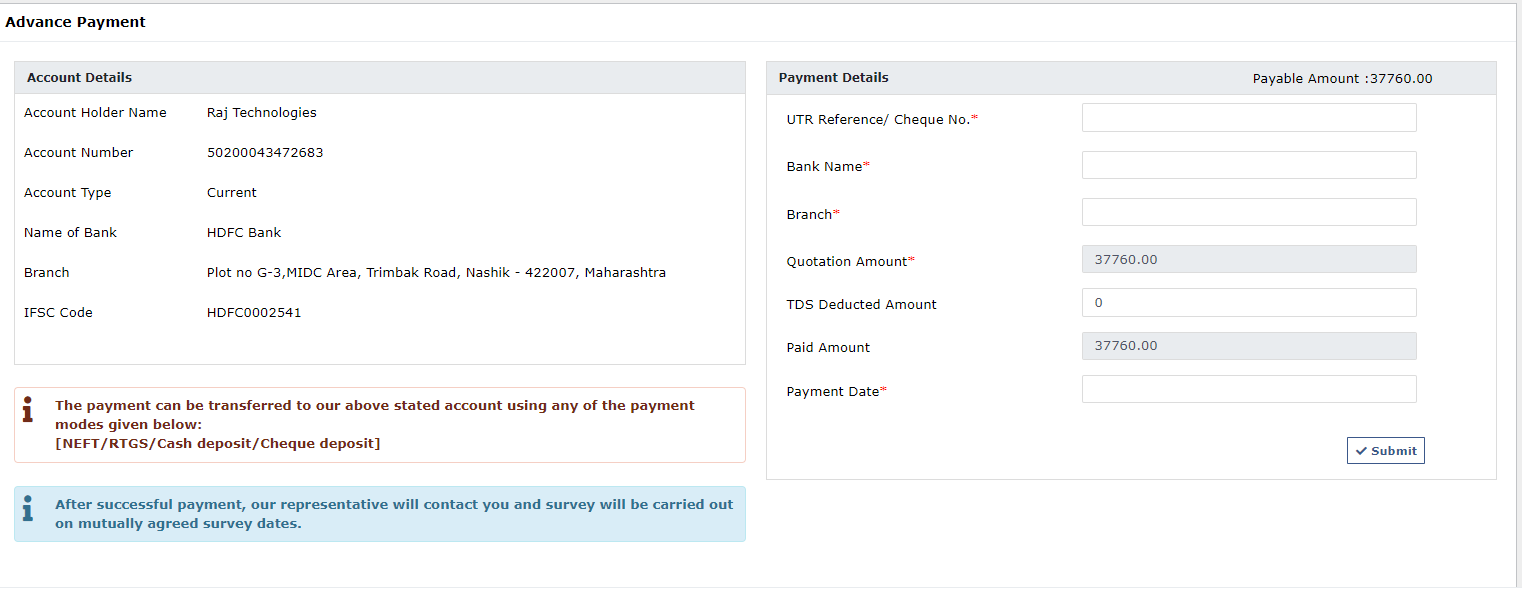
If user wants edit the payment details he/she can edit all fields except Quotation Amount and Paid Amount until admin accept the payment.
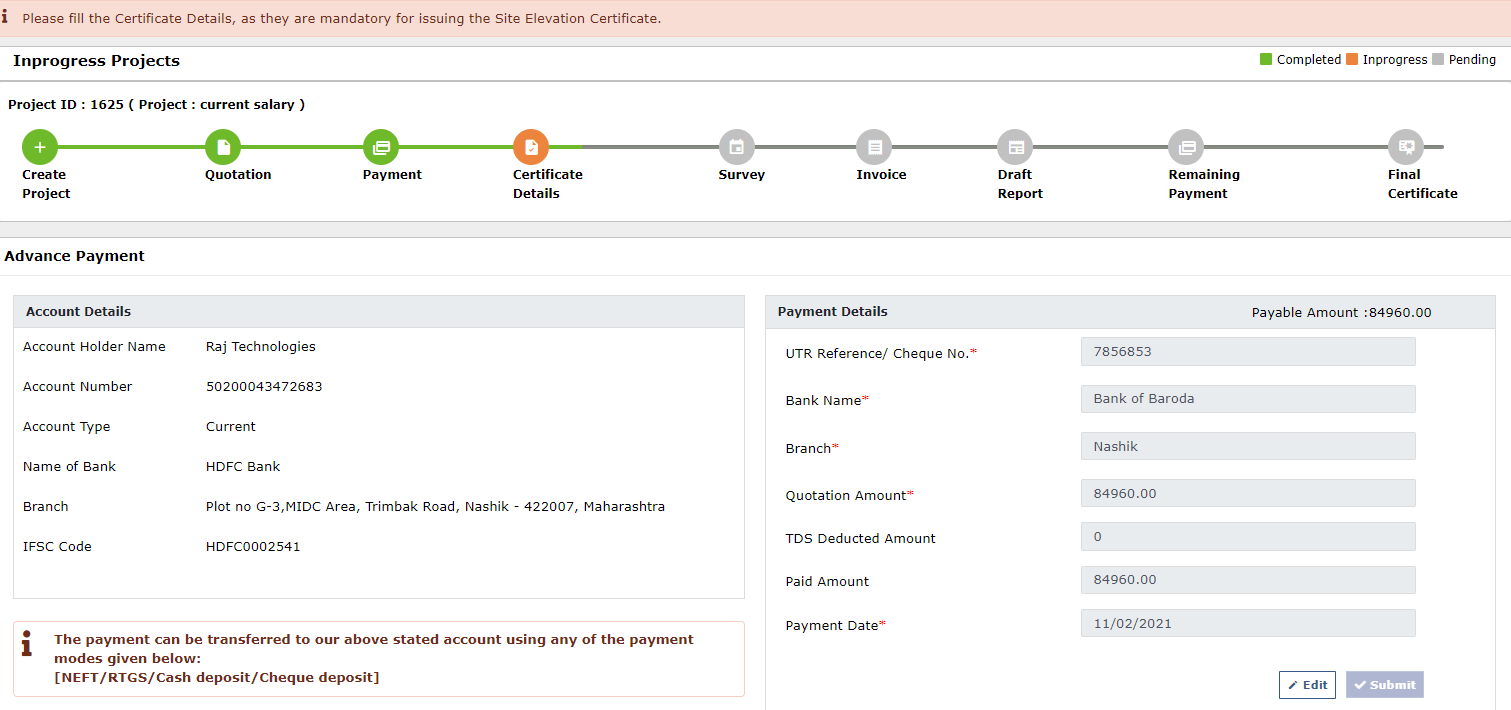
User will fill all the payment details then click on Submit button where Payment Confirmation pop-up open.
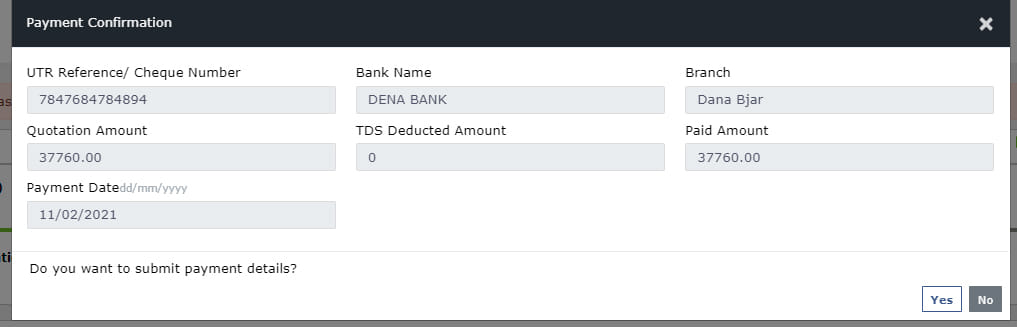
Here User can view his/her payment details.
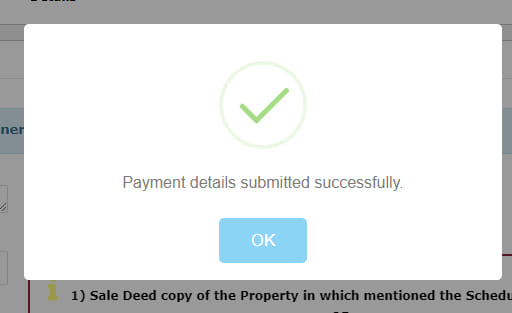
The application asks “Do you want to submit payment details?” then “Payment details submitted successfully” this message appears when user selects Yes option.
Certificate Details
After successful payment User navigates to Certificate Details Page. User can view the certificate details state view in orange color and previous state view in green color.
- Here user needs to fill the Certificate details like:
- Site Address
- Site/Plot No. (as per the local bodies map)
- Plot ownership Document (Here user needs to upload plot ownership document)
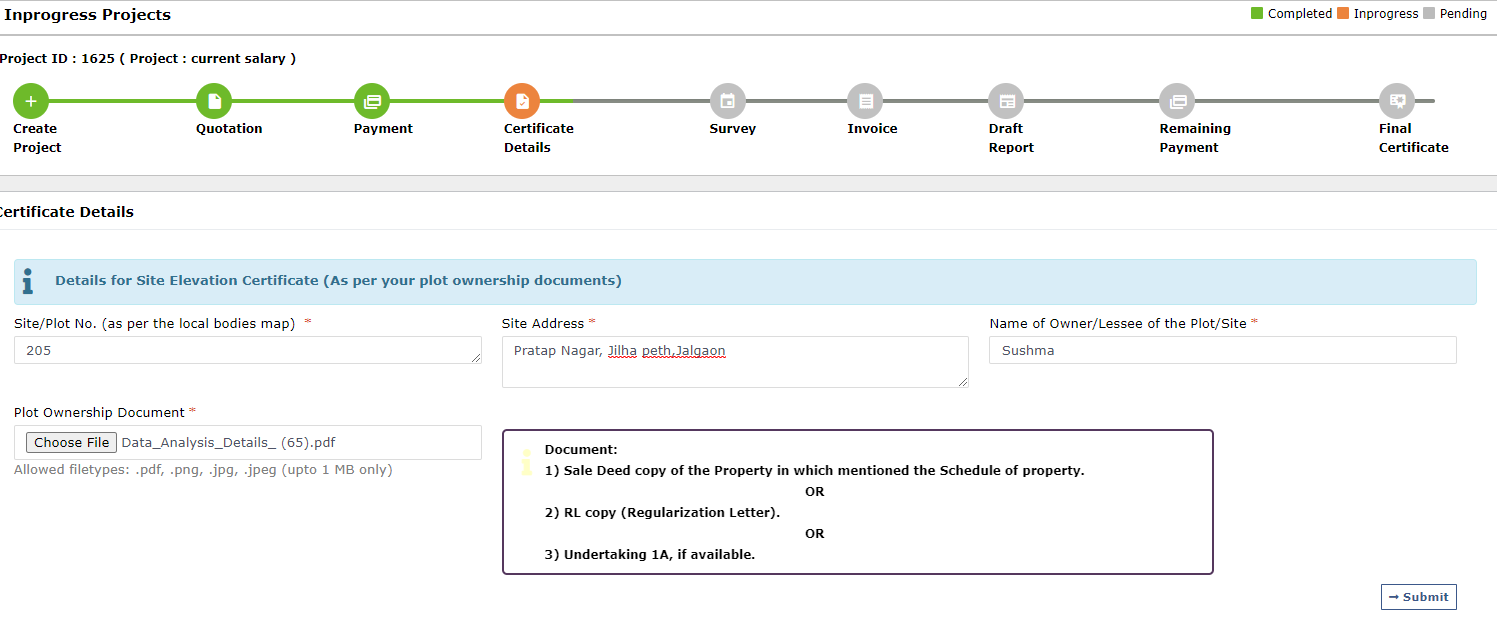
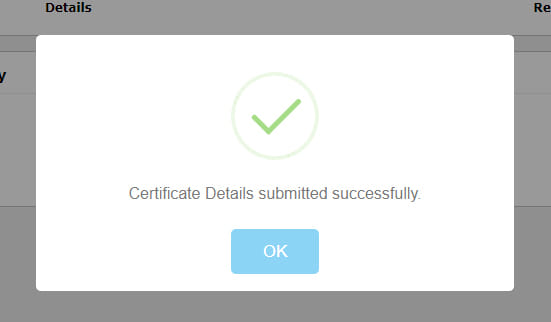
User fills the certificate details then click on Submit button that time “Certificate details submitted successfully” message appear in pop up.
User can change the “Certificate Details” until the admin uploads the Final Certificate.
Then user can view the survey state in orange color and the instruction message is shown as “Survey date is not yet confirmed by Admin.” because admin has not yet selected survey date.
Survey
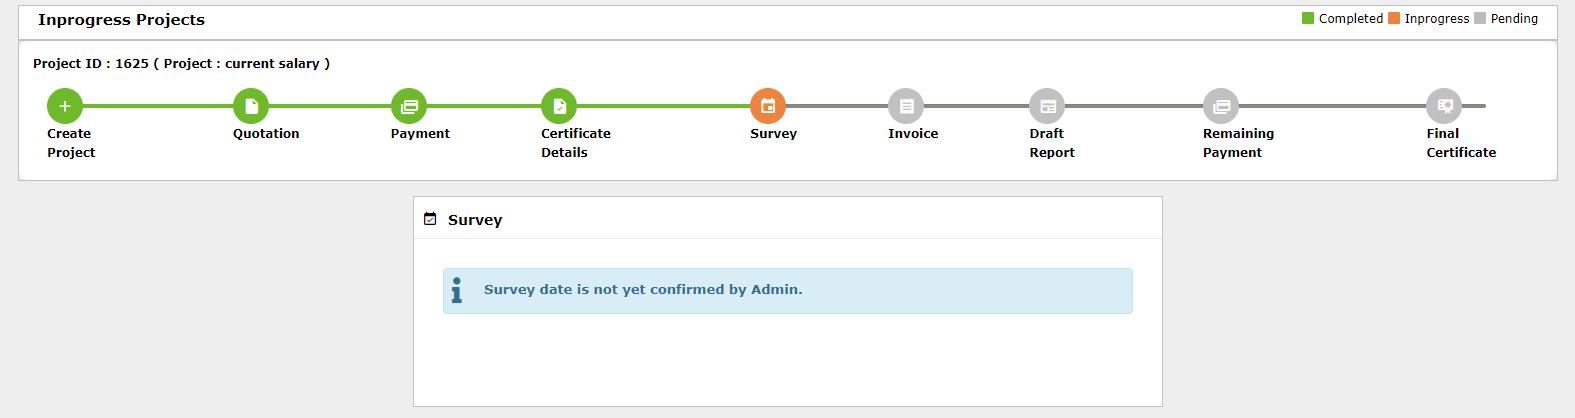
When admin selects the survey date, user can view the selected date of survey.

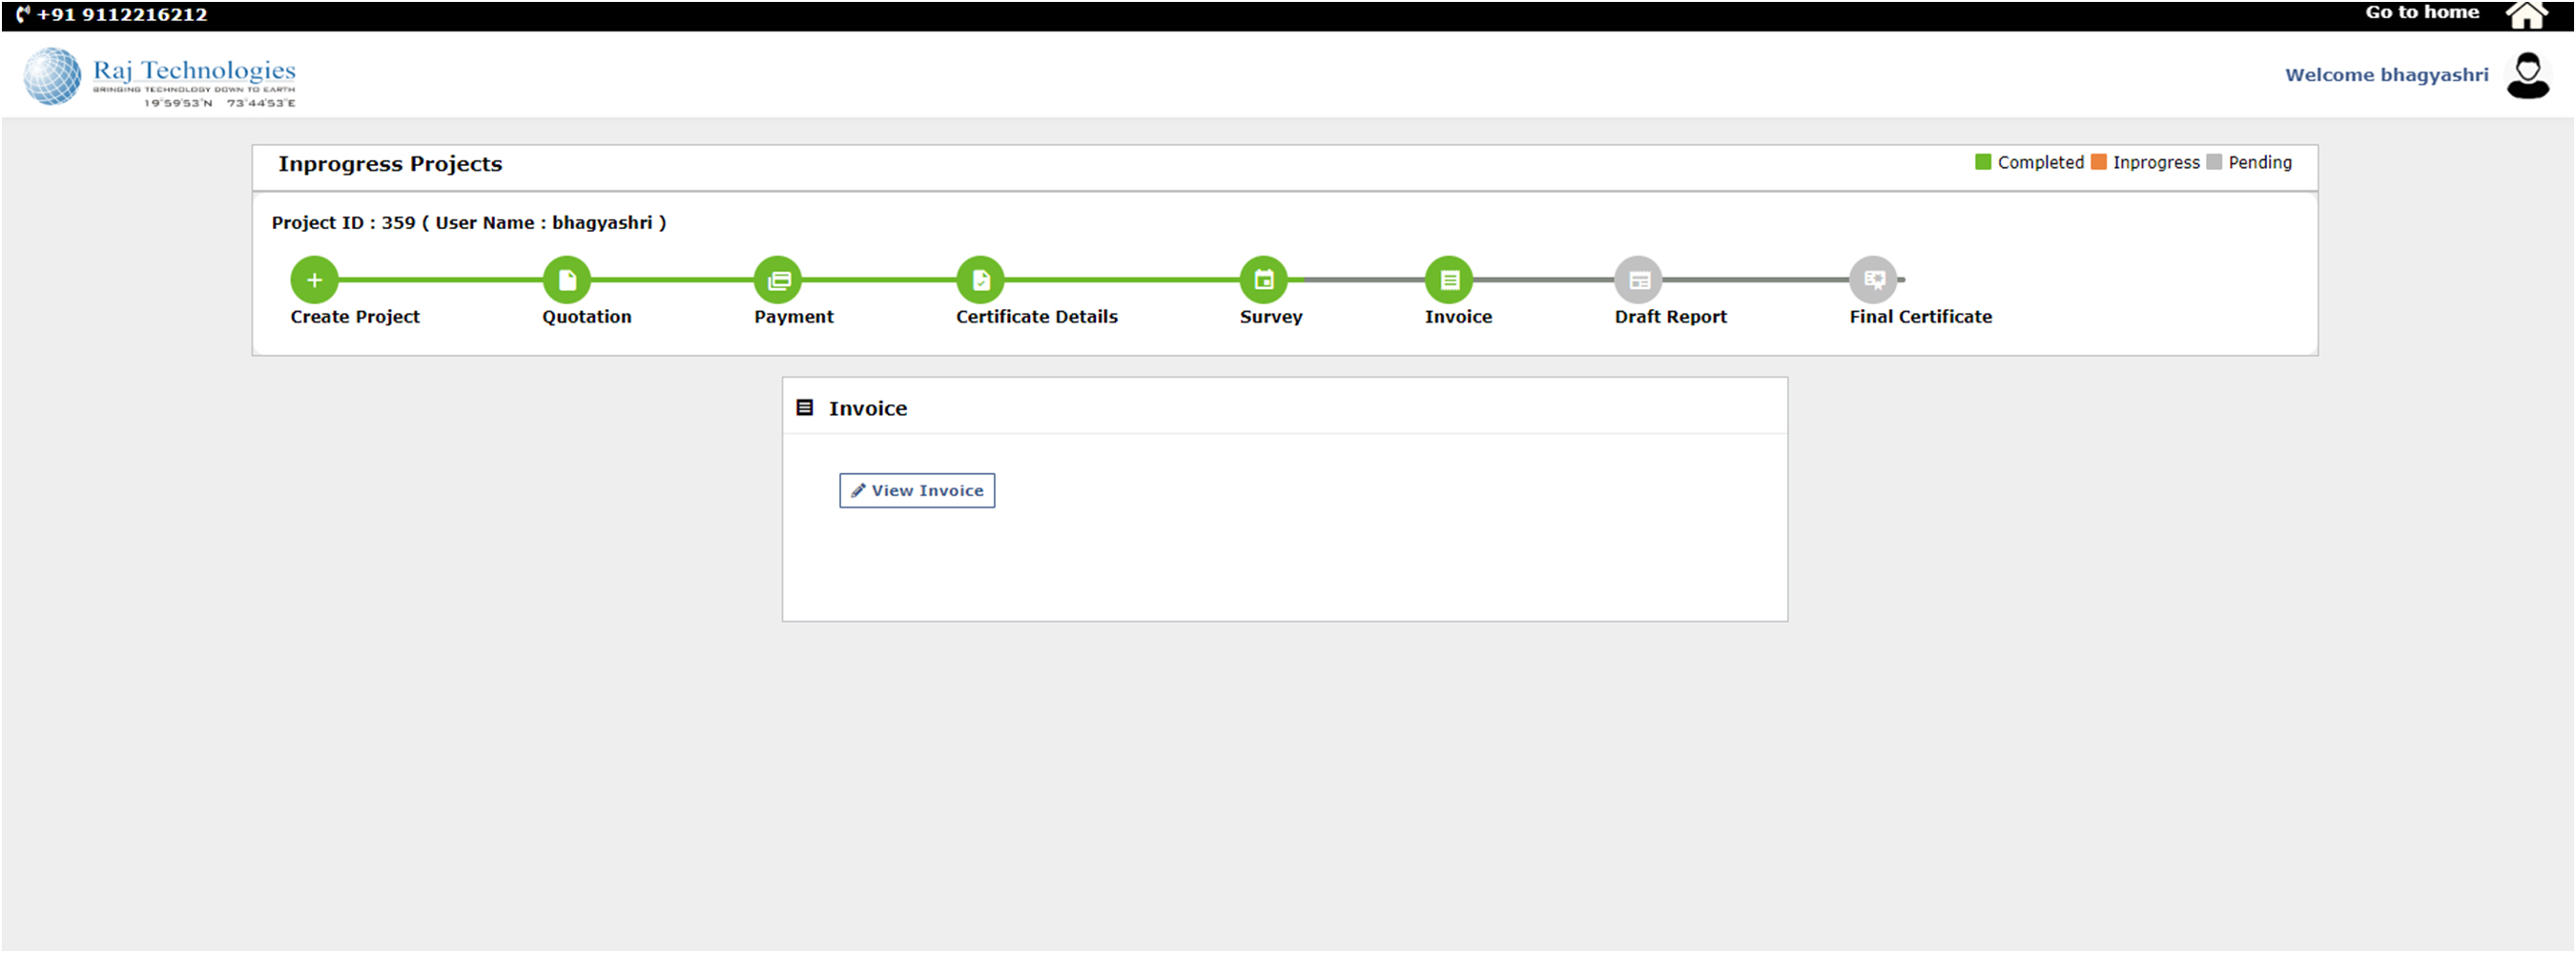
Invoice
Here user can view the invoice state in orange color in project status bar and also he/she can view the invoice generated by admin.
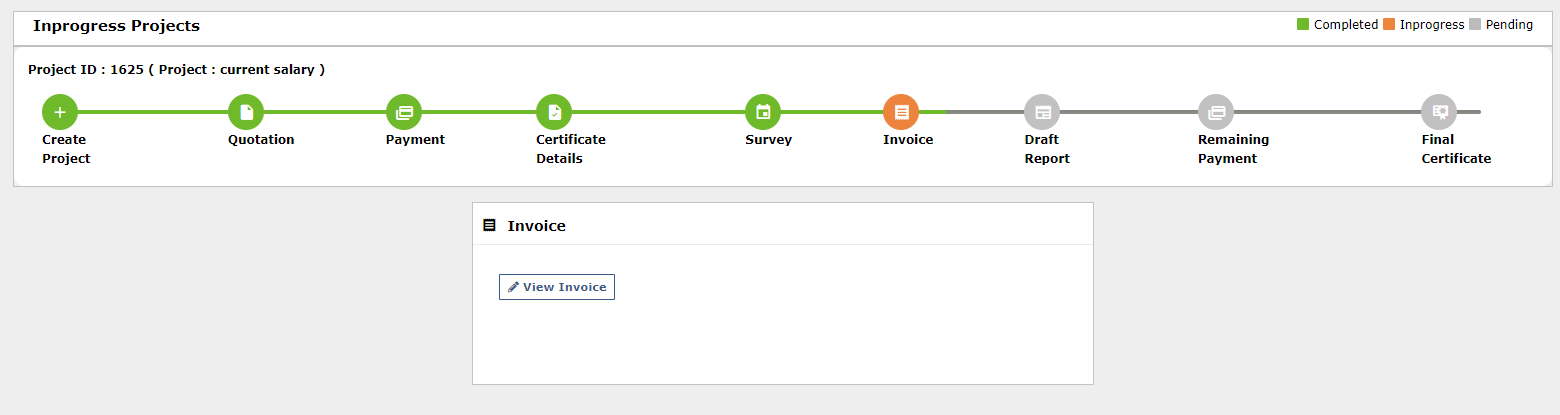
When user clicks on view invoice button then he/she view the invoice.
After admin confirms Invoice, Invoice state in status bar is shown in green color.
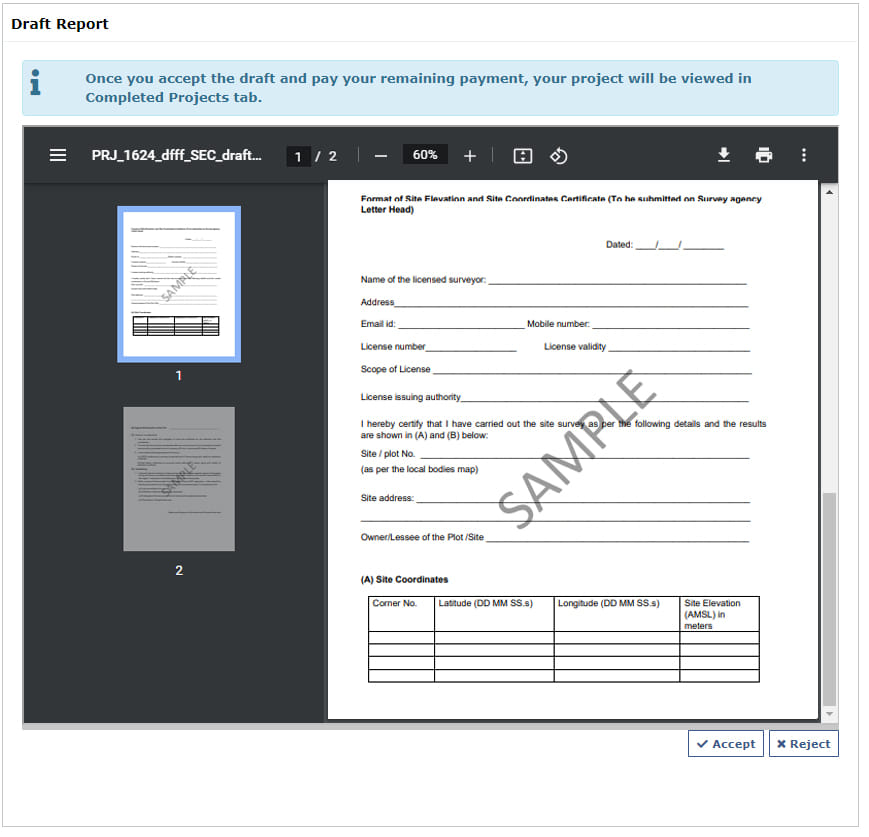
Draft Report
When admin uploads the draft, on the project status bar the draft report state is viewed in orange color. On Draft Report state click, user can see the draft report uploaded by admin.
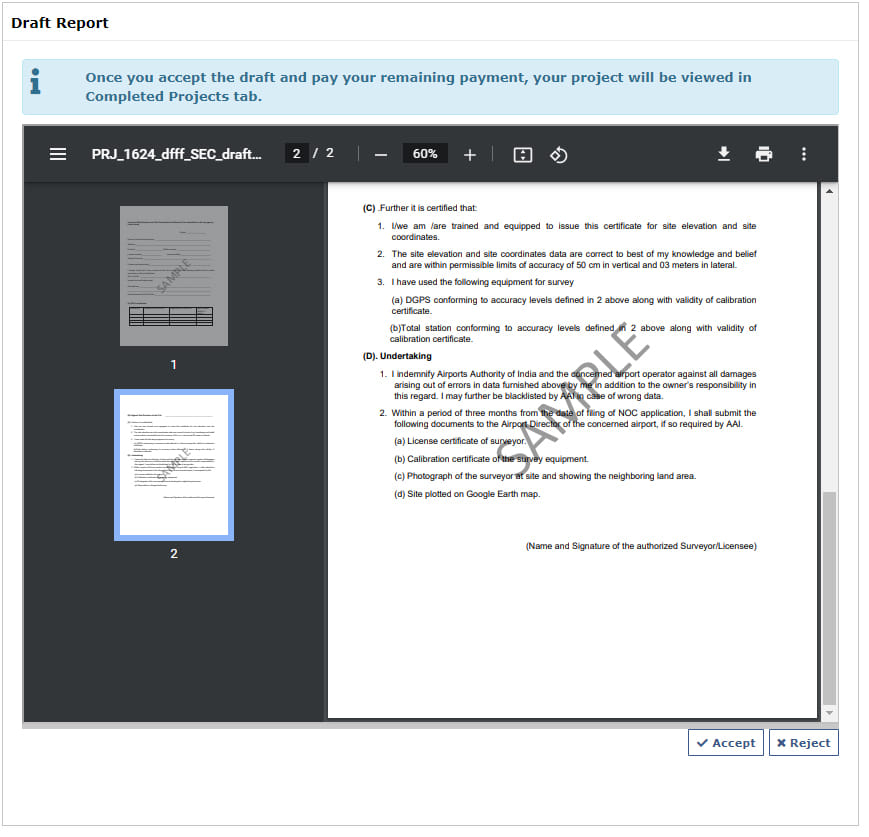
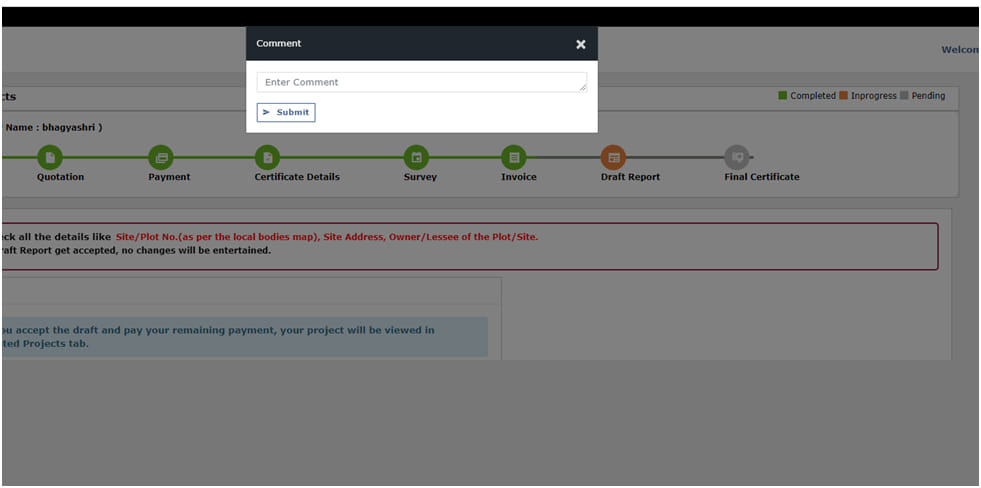
User can reject Draft Report on Reject button click popup where rejection comment is mandatory.
Modified Draft report uploaded by Admin can be accepted by user on Accept button click.
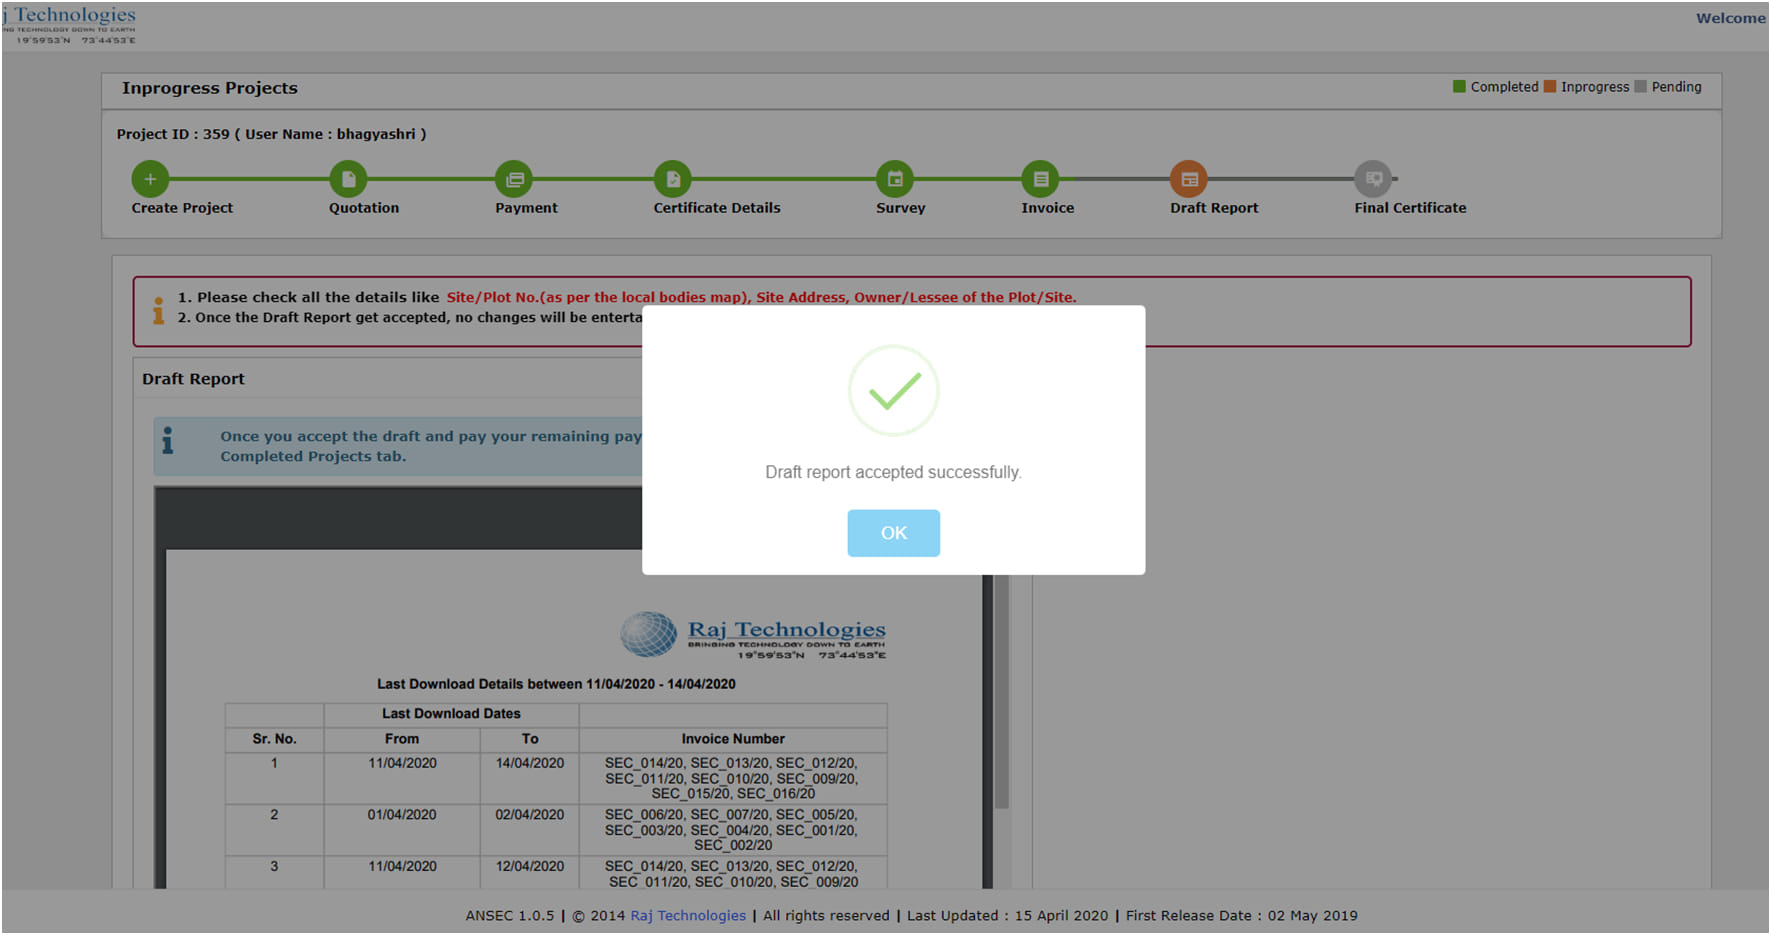
“Draft report accepted successfully” message is shown when User click on Accept button.
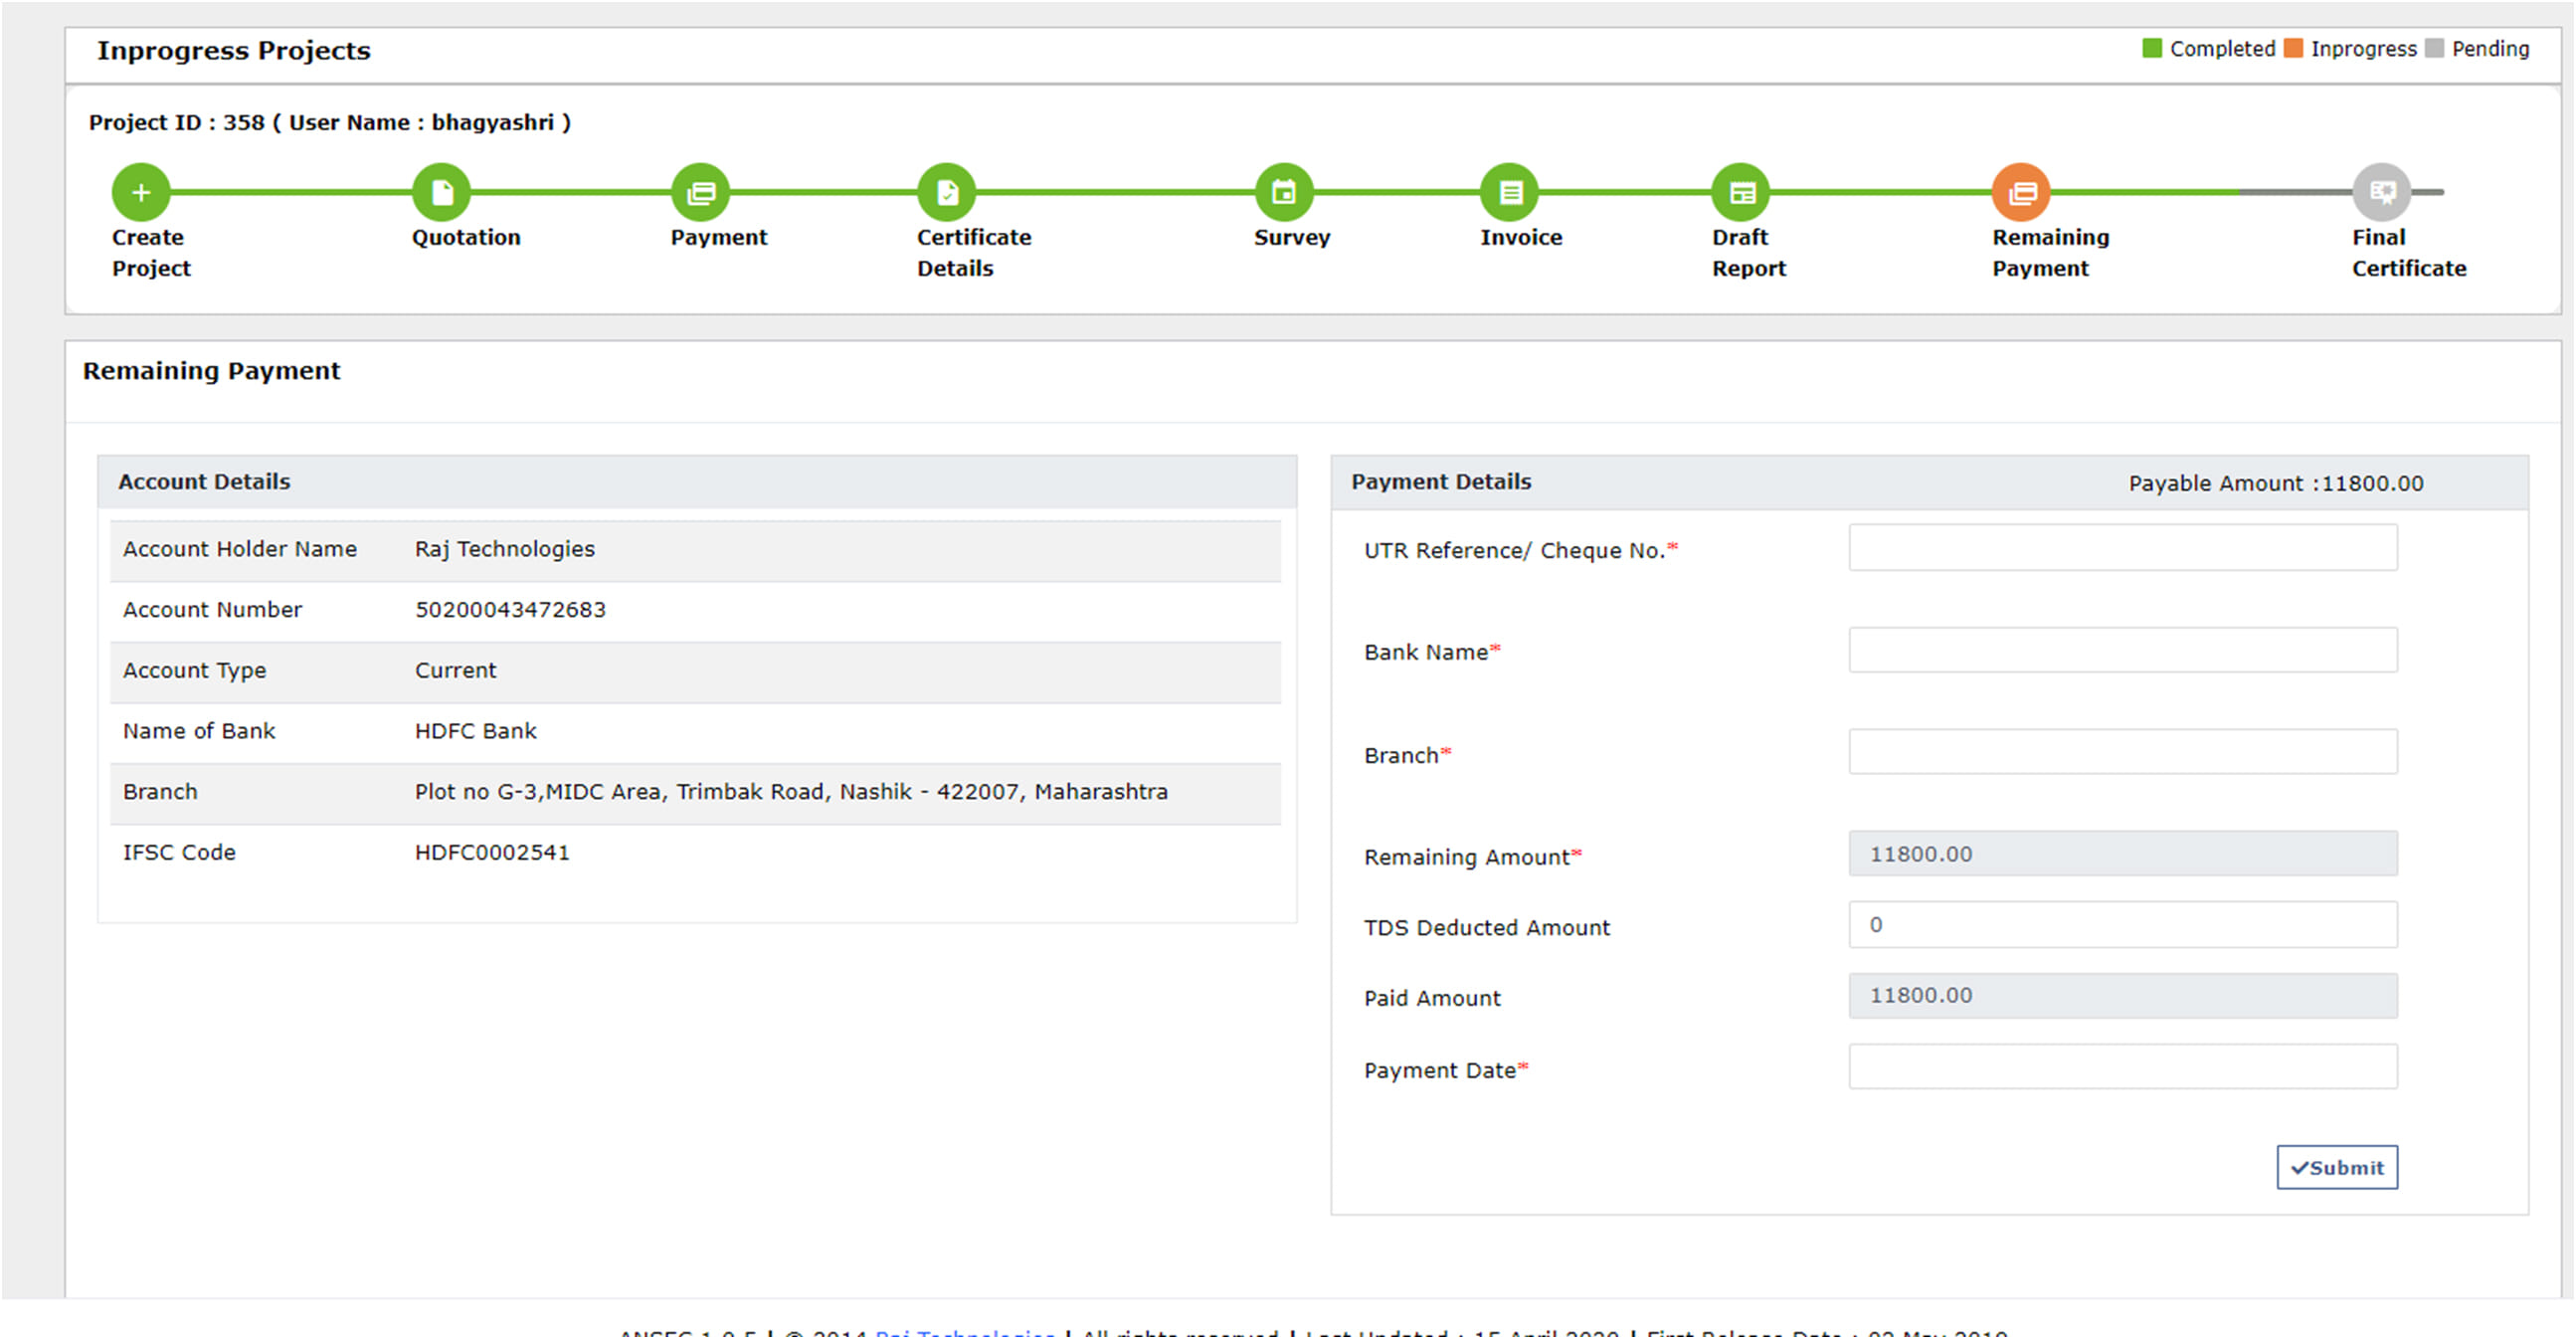
Remaining Payment
For extra survey points user has to pay remaining amount in Remaining Payment state which appears in orange color in status bar.
- Here User is able to view the Organization account details like:
- Account holder name
- Account number
- Account type
- Name of Bank
- Branch
- IFSC Code.
- Then User Filled Payment details like
- UTR Reference/Cheque No.
- Bank Name
- Branch
- Remaining Amount (default loaded).
- TDS Deducted Amount
- Paid Amount (auto calculated based on TDS deduction).
- Payment Date
User can reject Draft Report on Reject button click popup where rejection comment is mandatory.
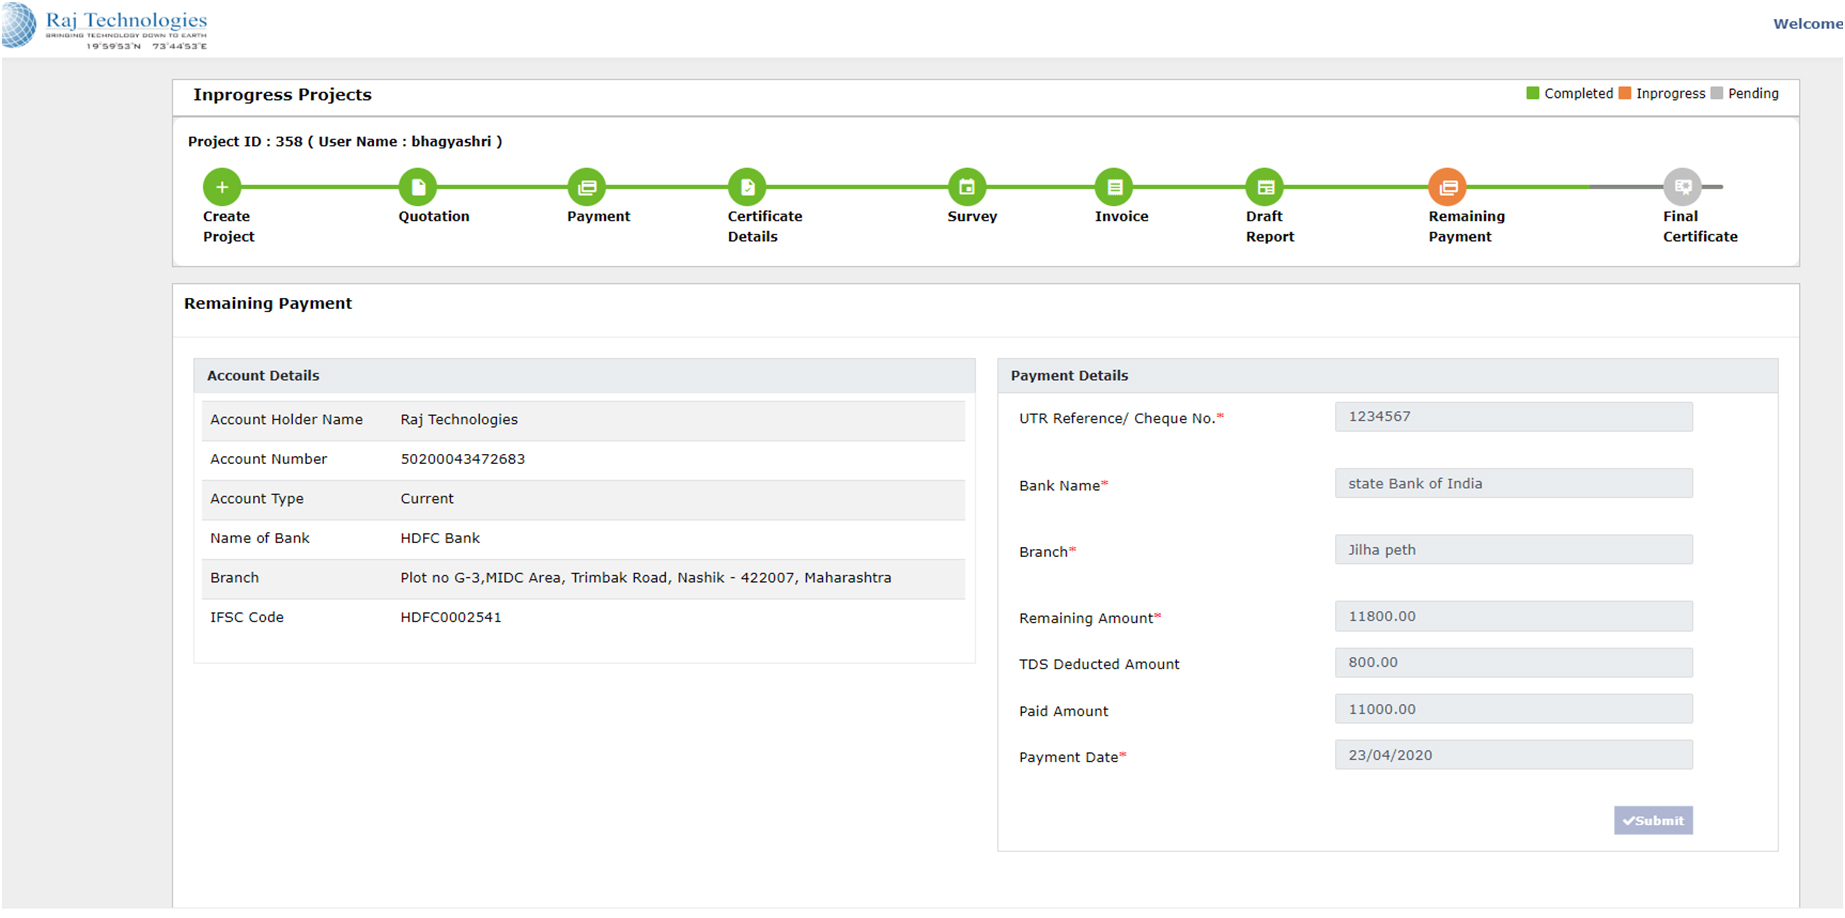
“Remaining Payment Submitted Successfully” message is shown when User click on Submit button.
If user wants to edit the Remaining payment details he/she can edit the Remaining Payment Details
except the Remaining amount and Paid Amount until admin accept the payment.
Final Certificate
Then on the project status bar the Final Certificate state is shown in orange color.

Admin upload the Final Certificate then the final certificate state is shown in green color on the project status bar.
After admin uploads Final Certificate project goes to completed project menu.
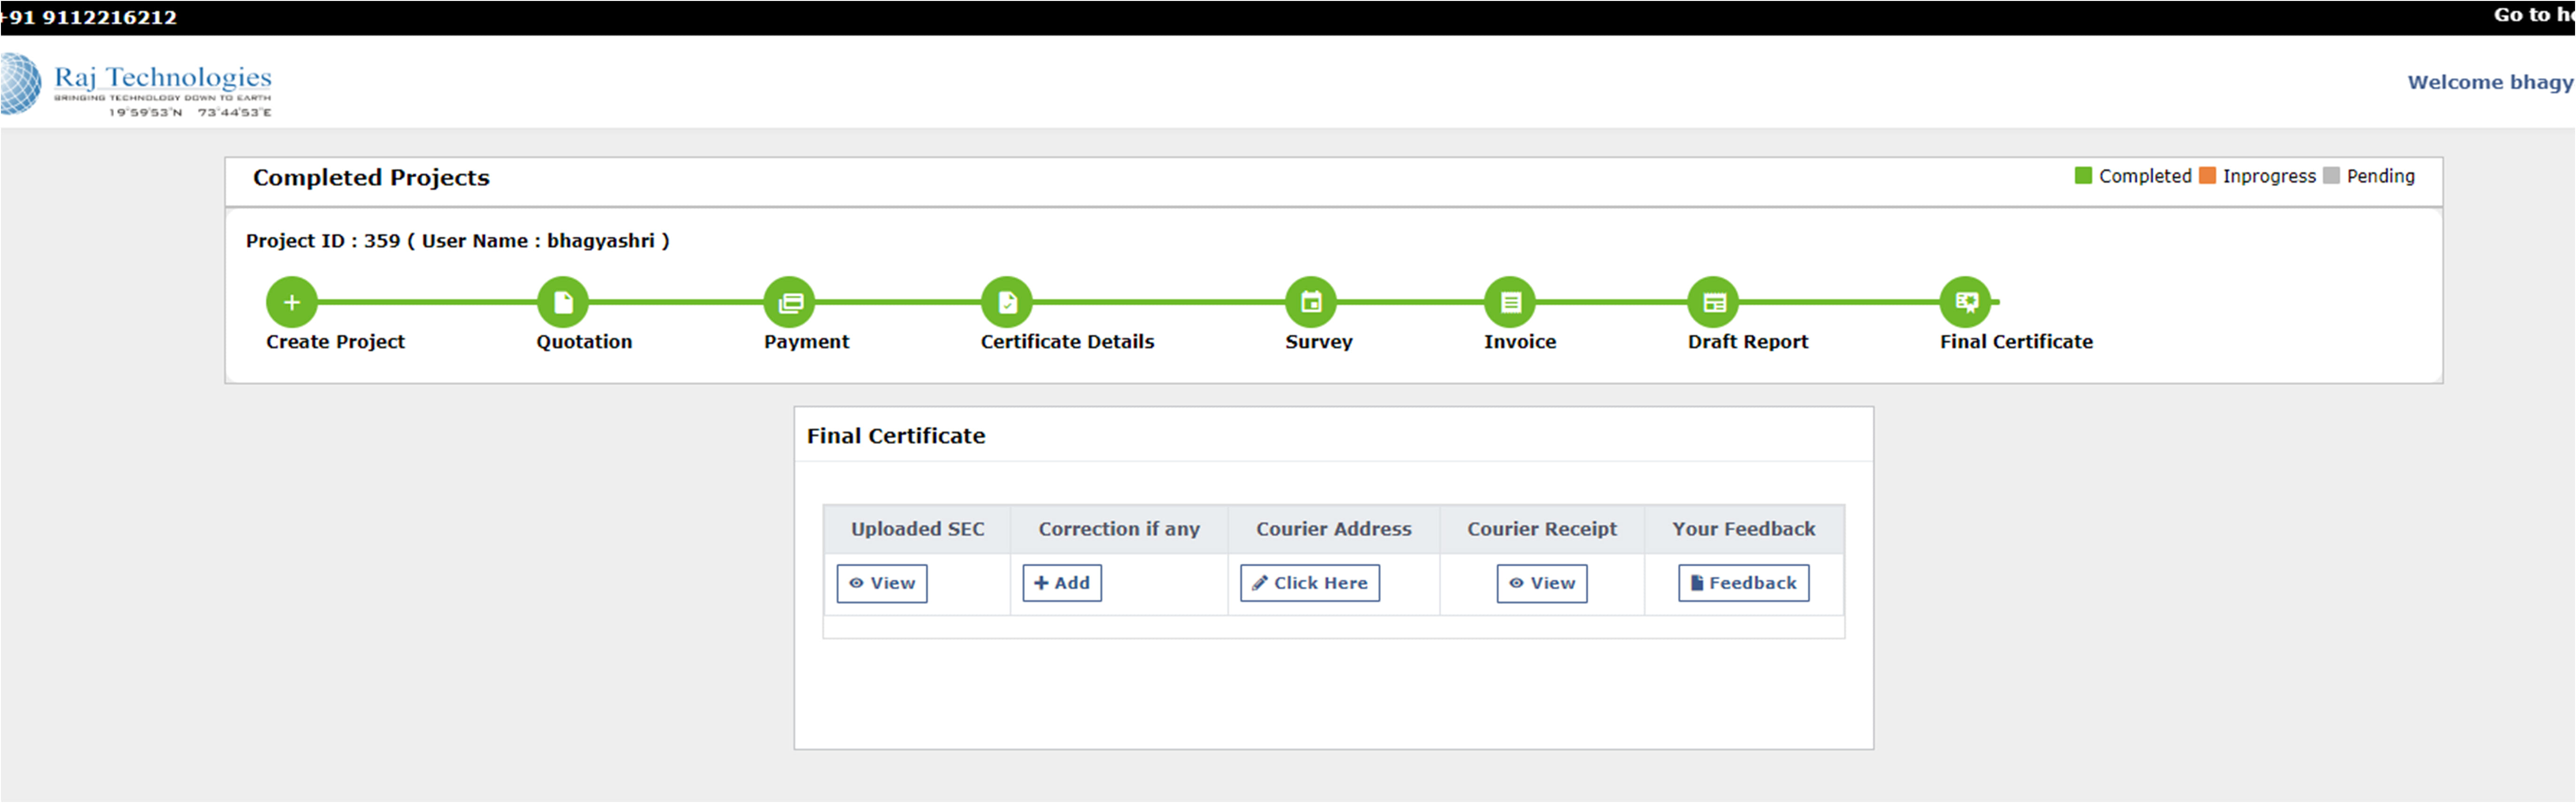
User can view the Final Certificate on View button click.
For correction on Final Certificate, user can add correction comment on Add button click.
User is sent the final certificate by courier on the user address submitted by him/her. If user wish to receive courier on another address, he/she needs to click on Click Here button in Courier Address column and edit address.
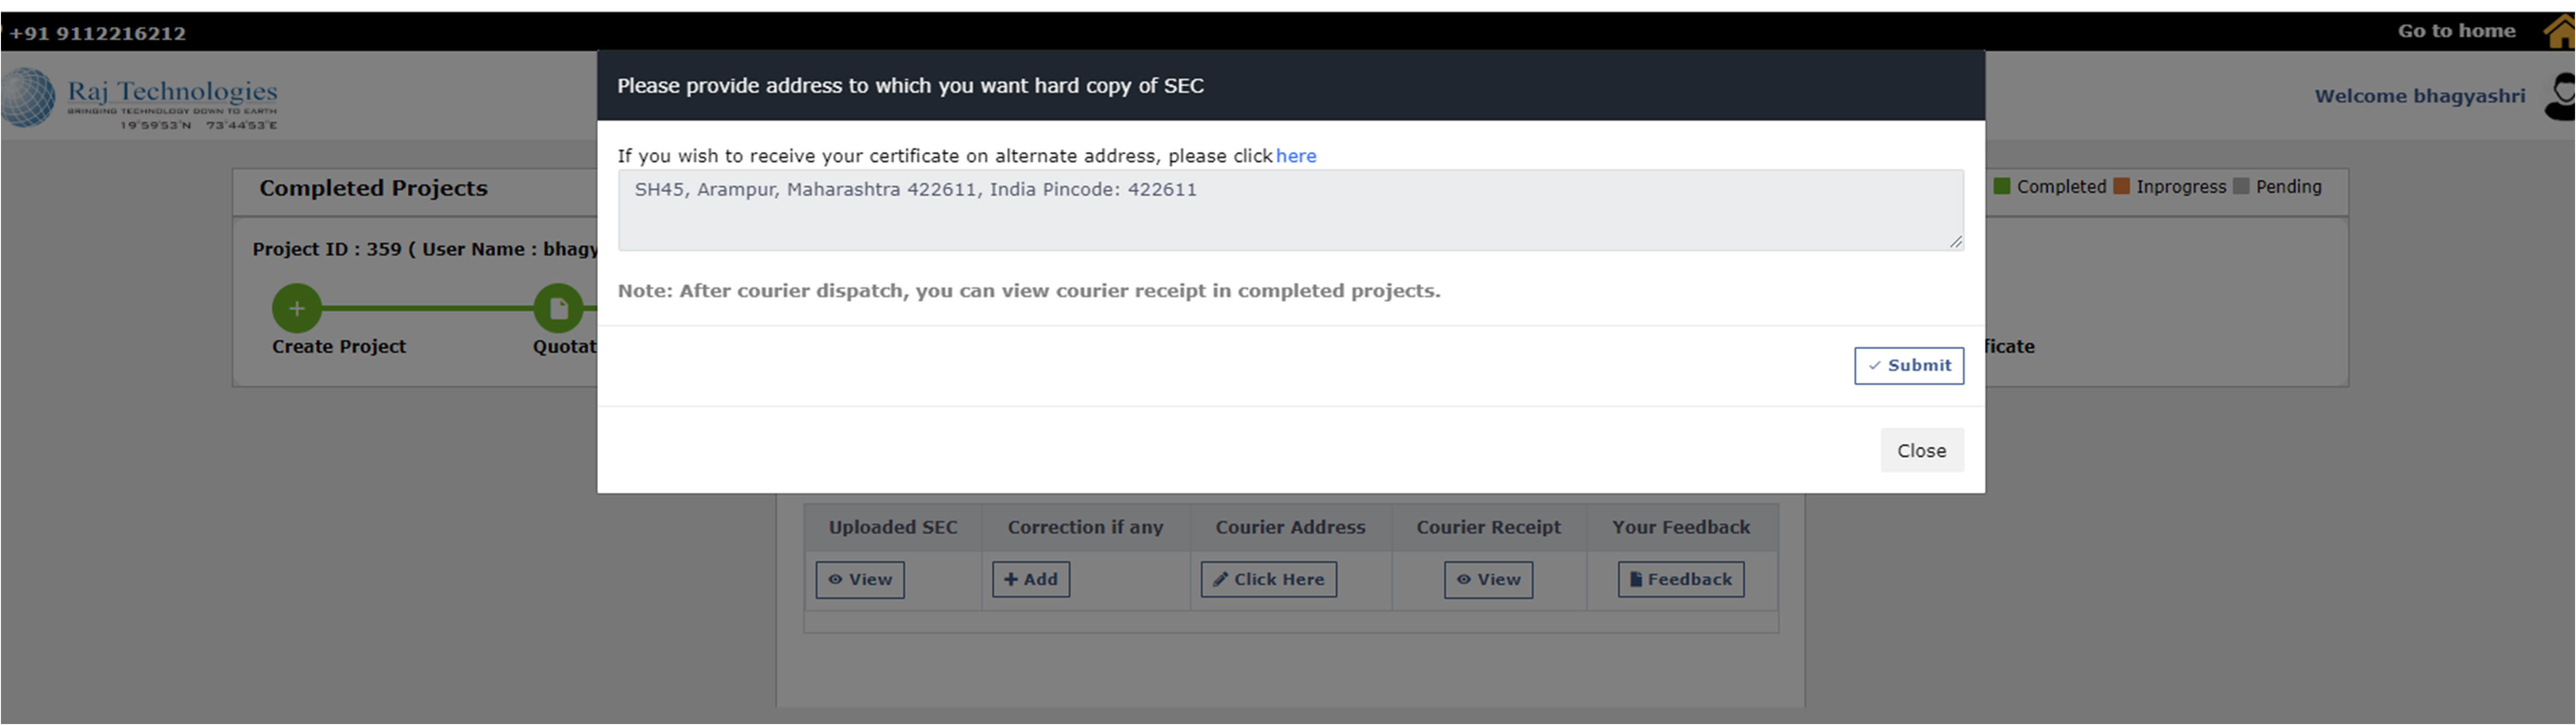
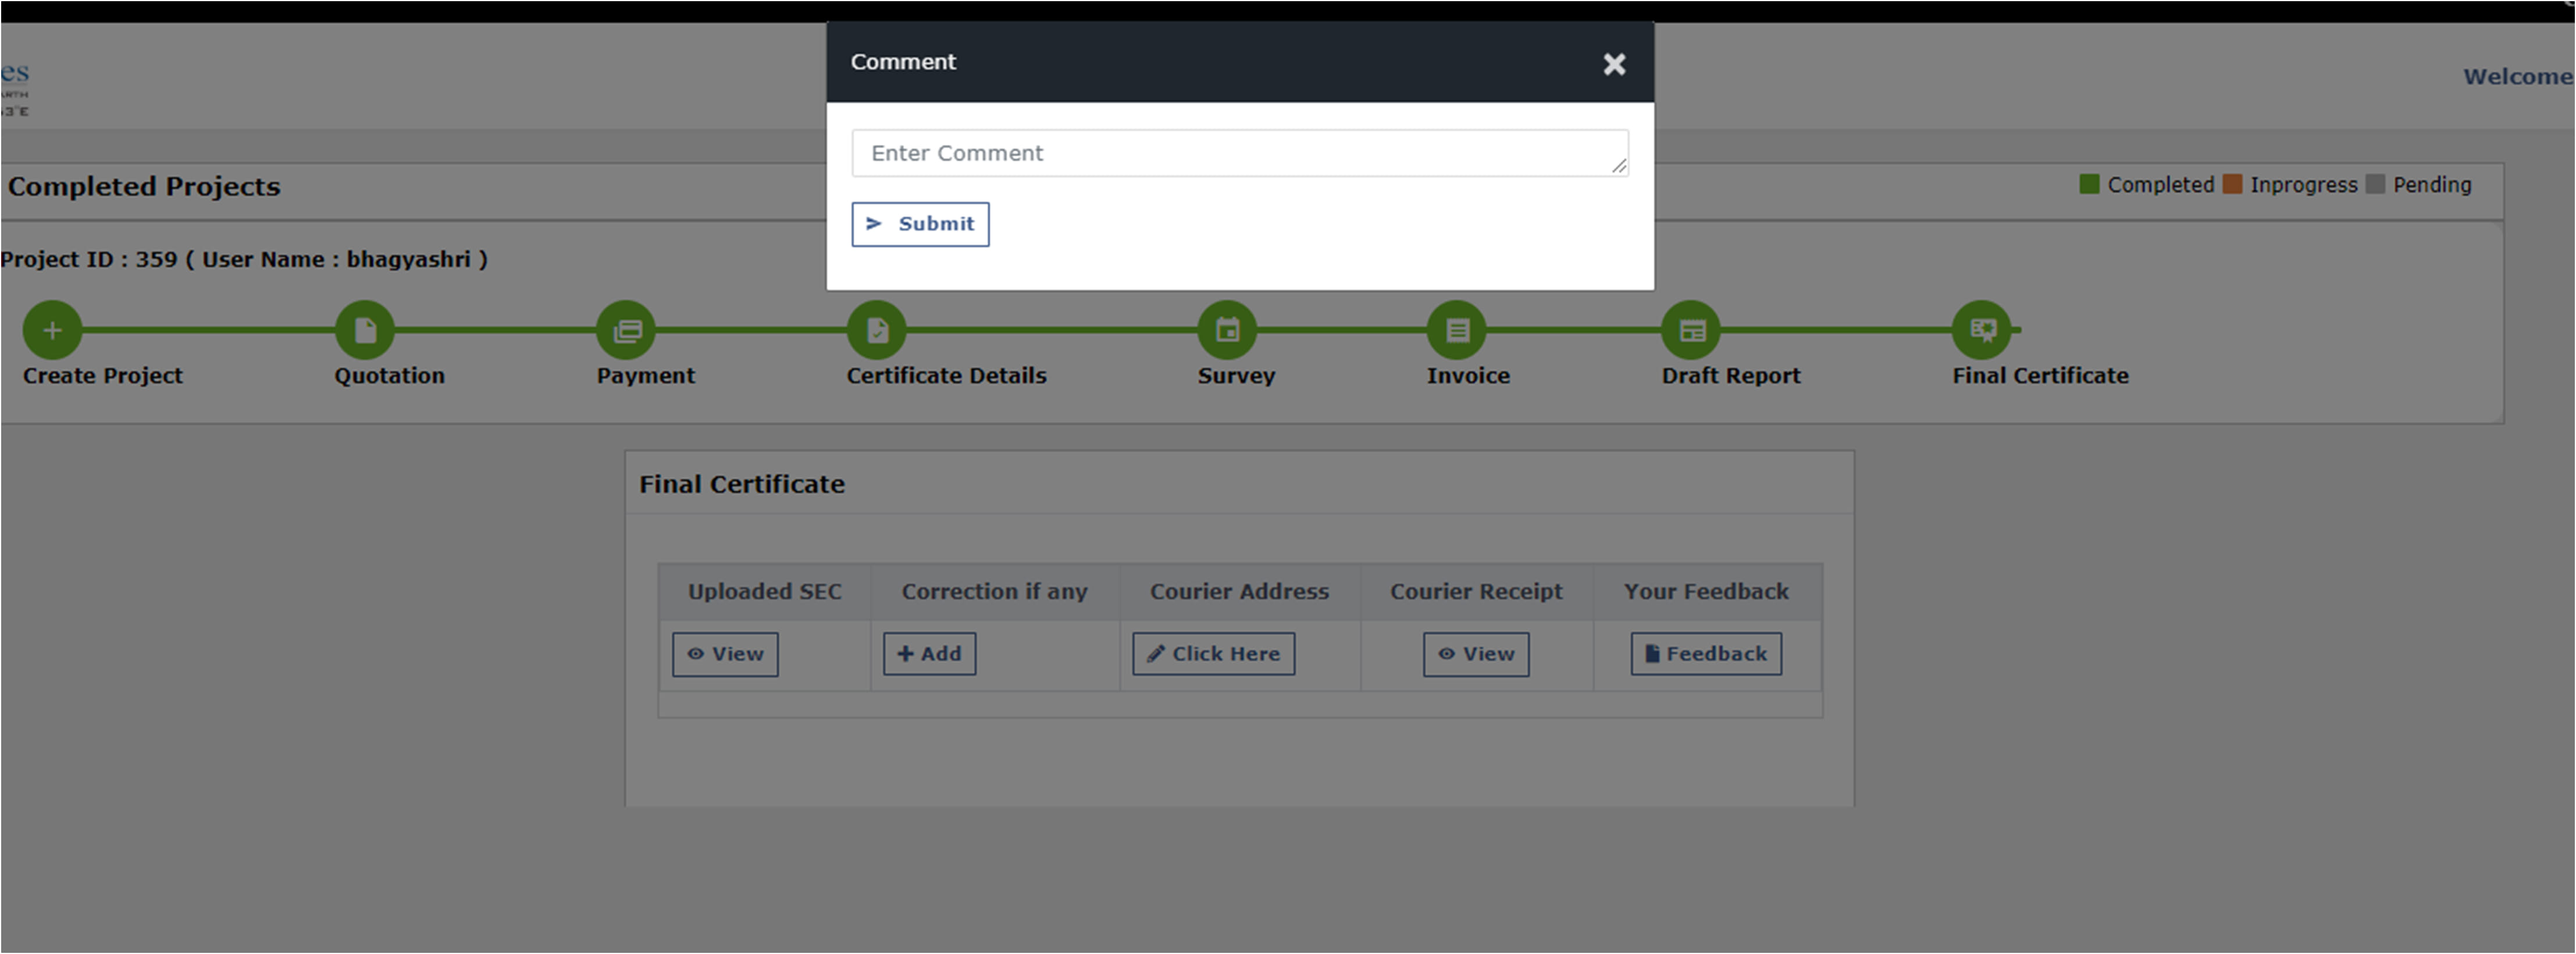
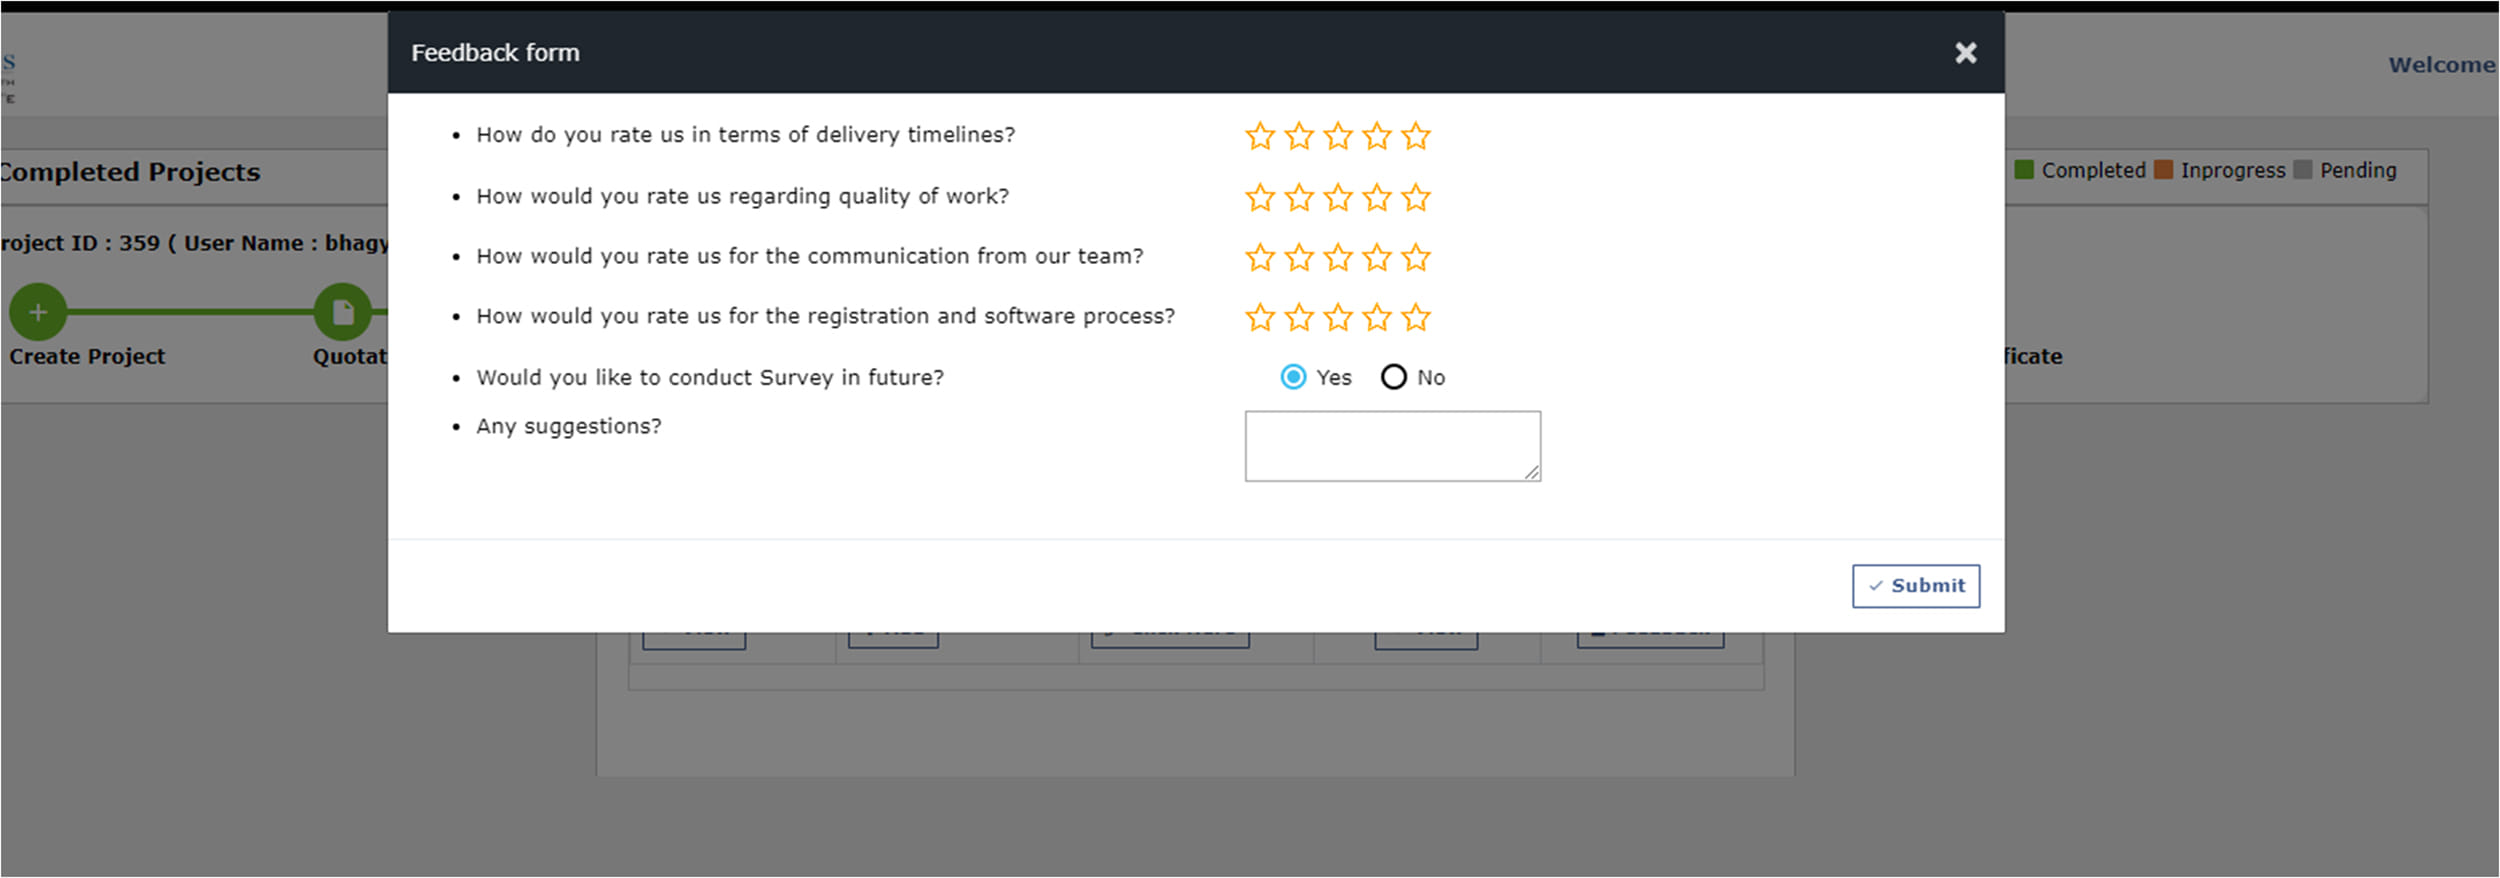
User can also give the feedback on Feedback button click.
Inprocess Project
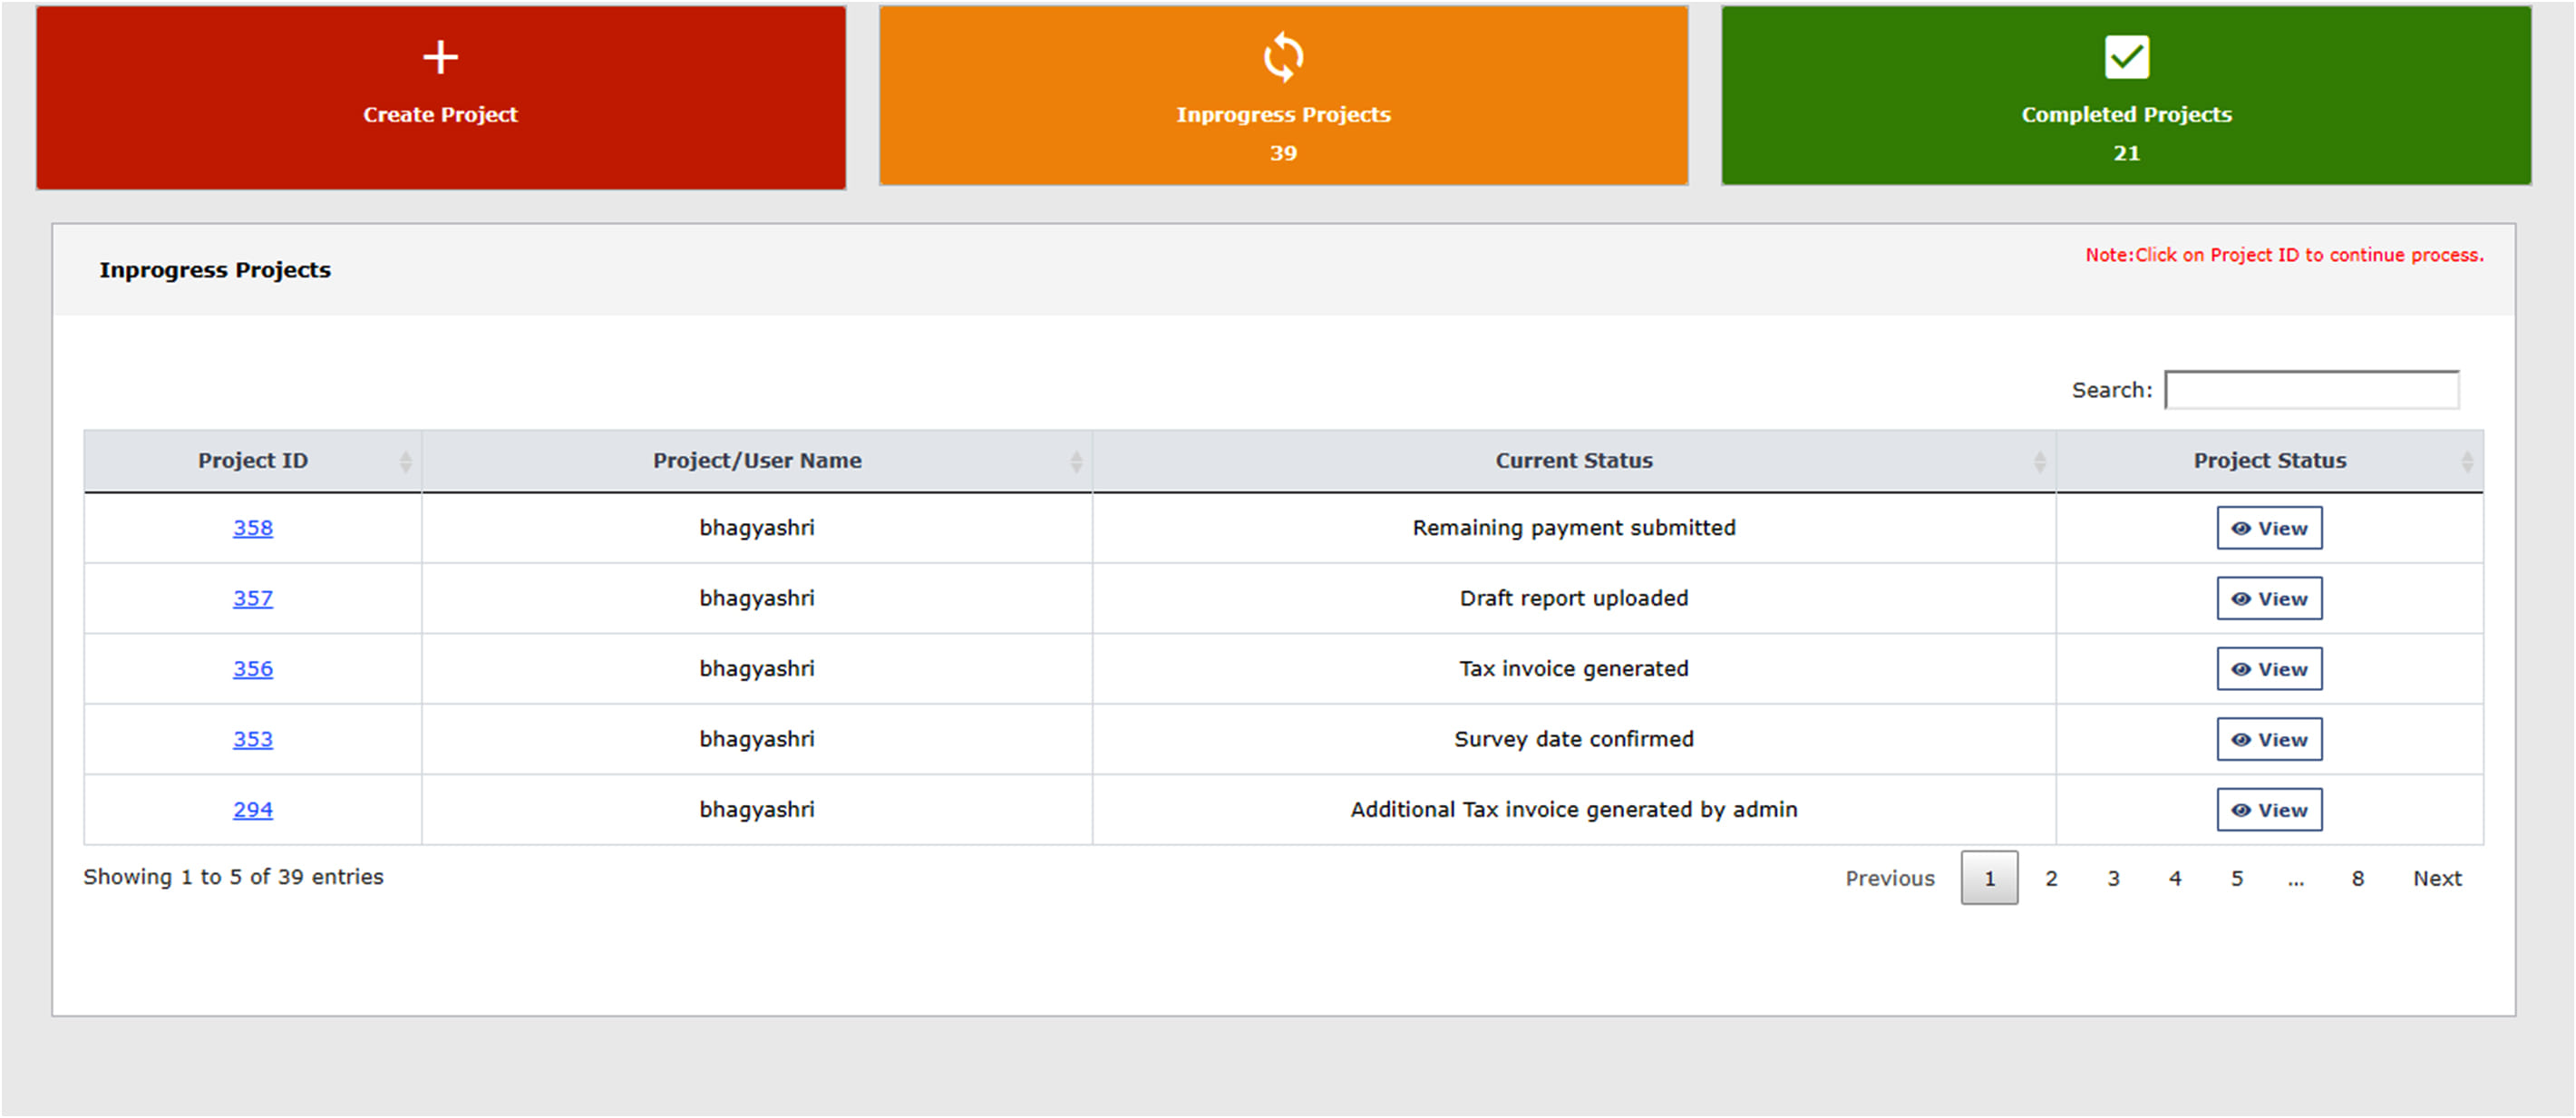
- On the home page User can view the In progress projects in table:
- Project ID- Project ID is created by serially, then click on that respected project id that time user navigate remaining process state page.
- Project/User Name- If put any project name when we create new project.
- Current Status- It shows the current status of the project.
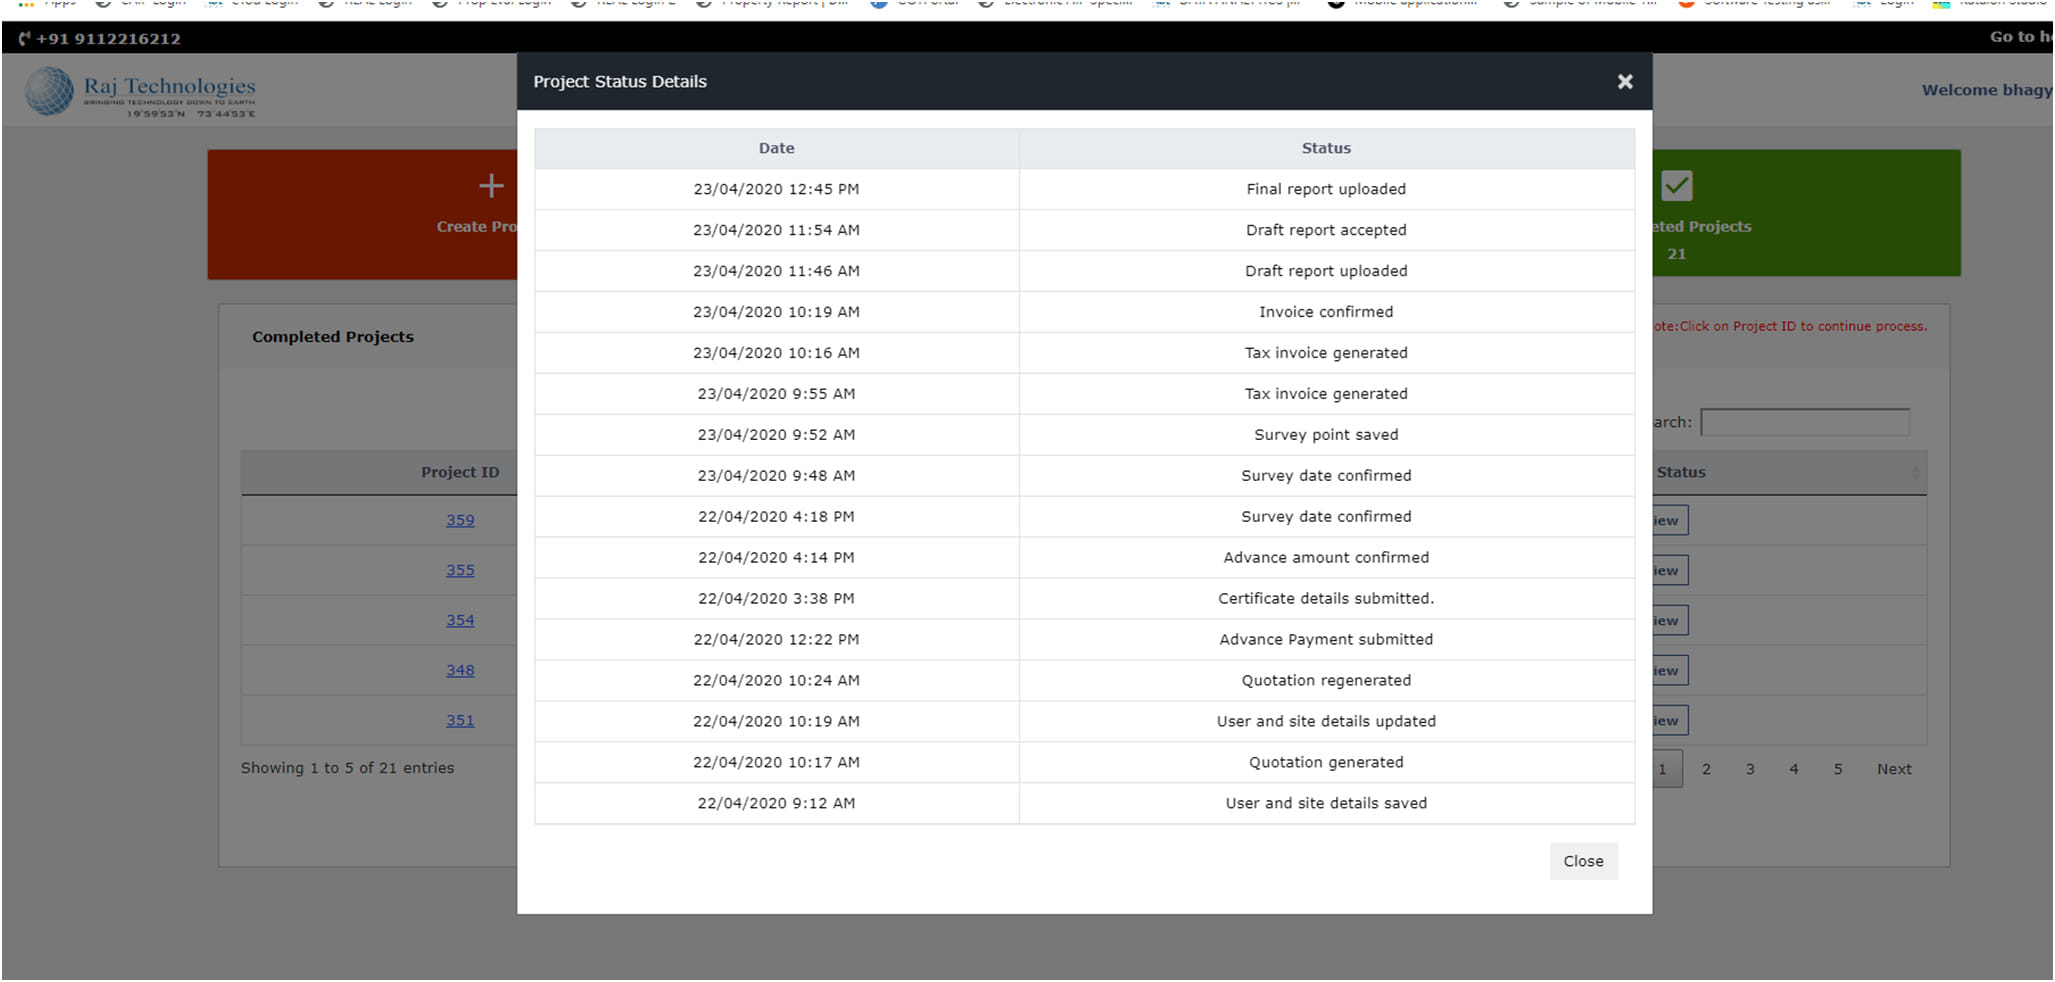
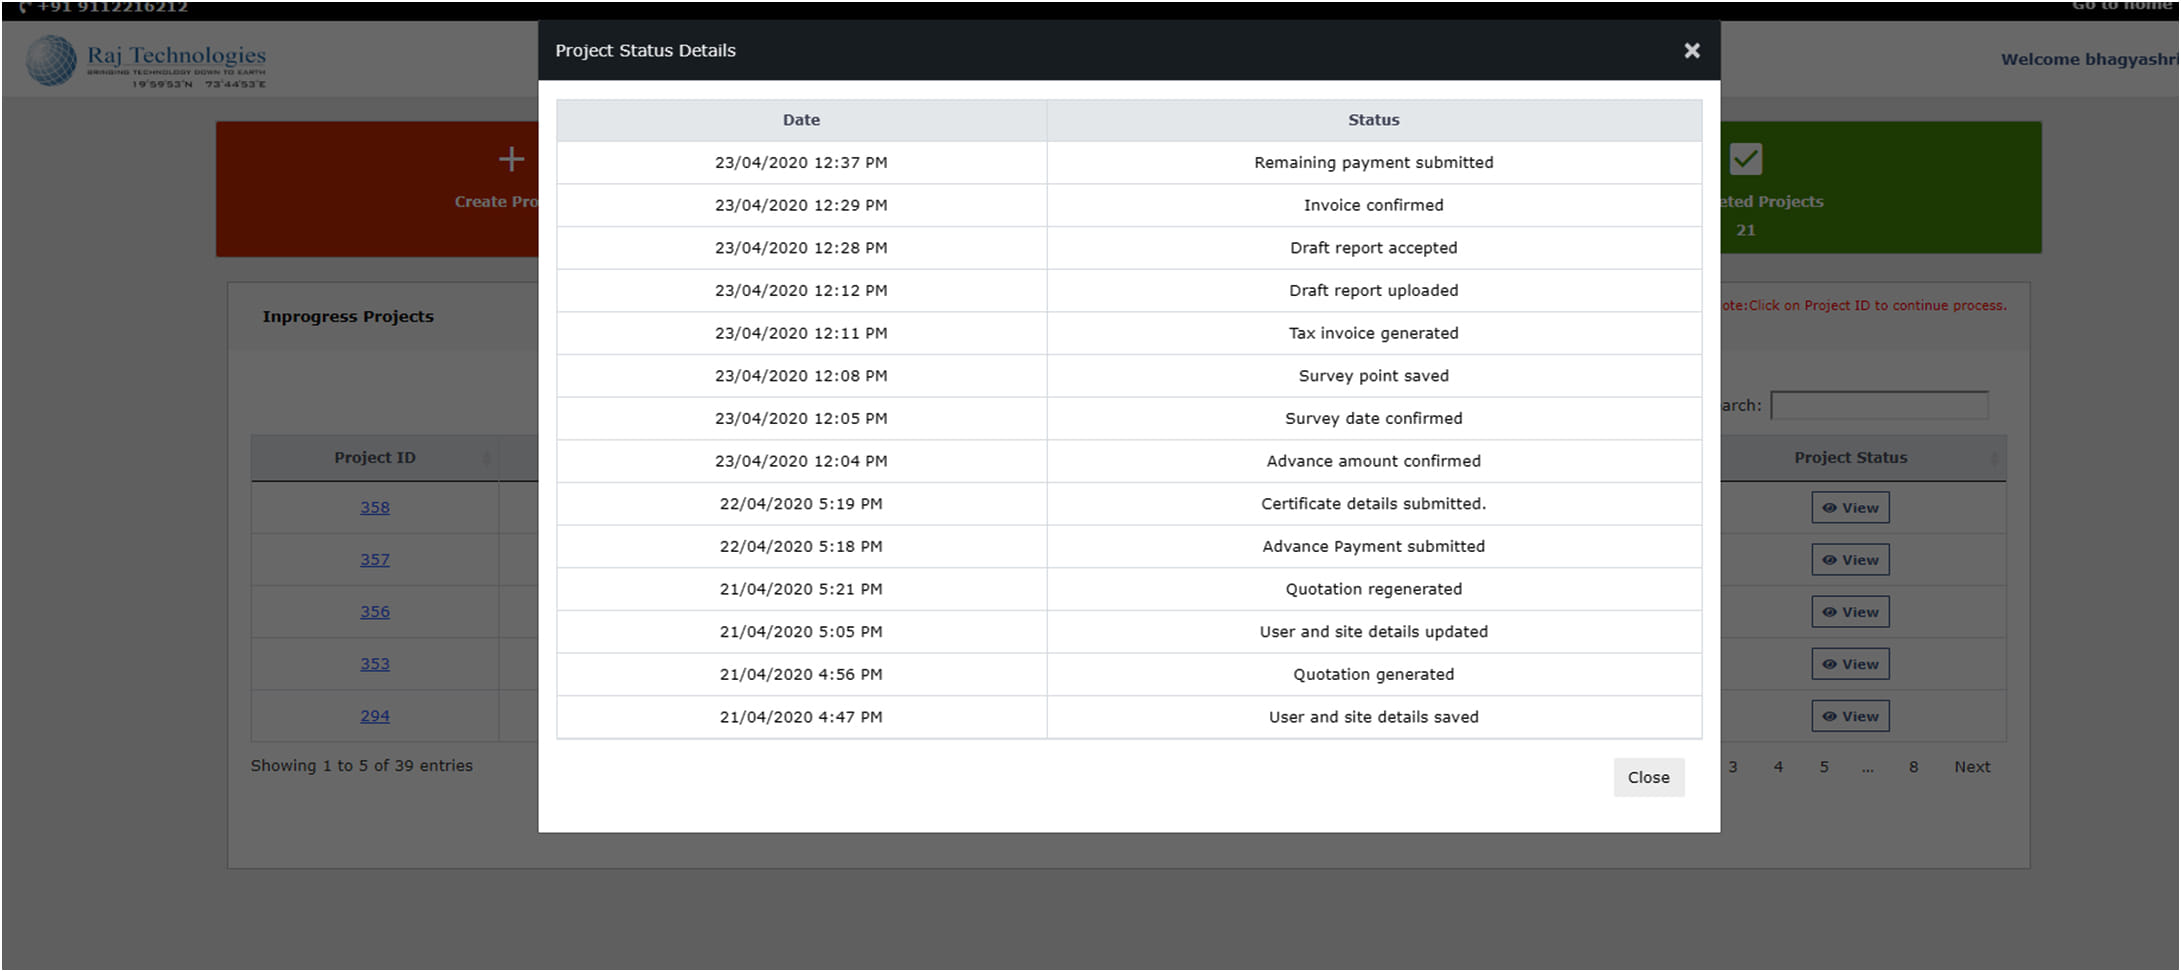
- Project Status-User can view the status log of project click on view button.
Completed Project
- When user clicks on the completed project that time Completed Project view in table:

- When Admin upload the final certificate, user’s project goes to Completed Project tab.
- Project ID- User can view the Project ID of completed project. When user click on the ID’s hyperlink that time navigate to completed project page.
- Project /User Name-User can view Project/User name.
- Project Status-User can view all the log of status click on View button.